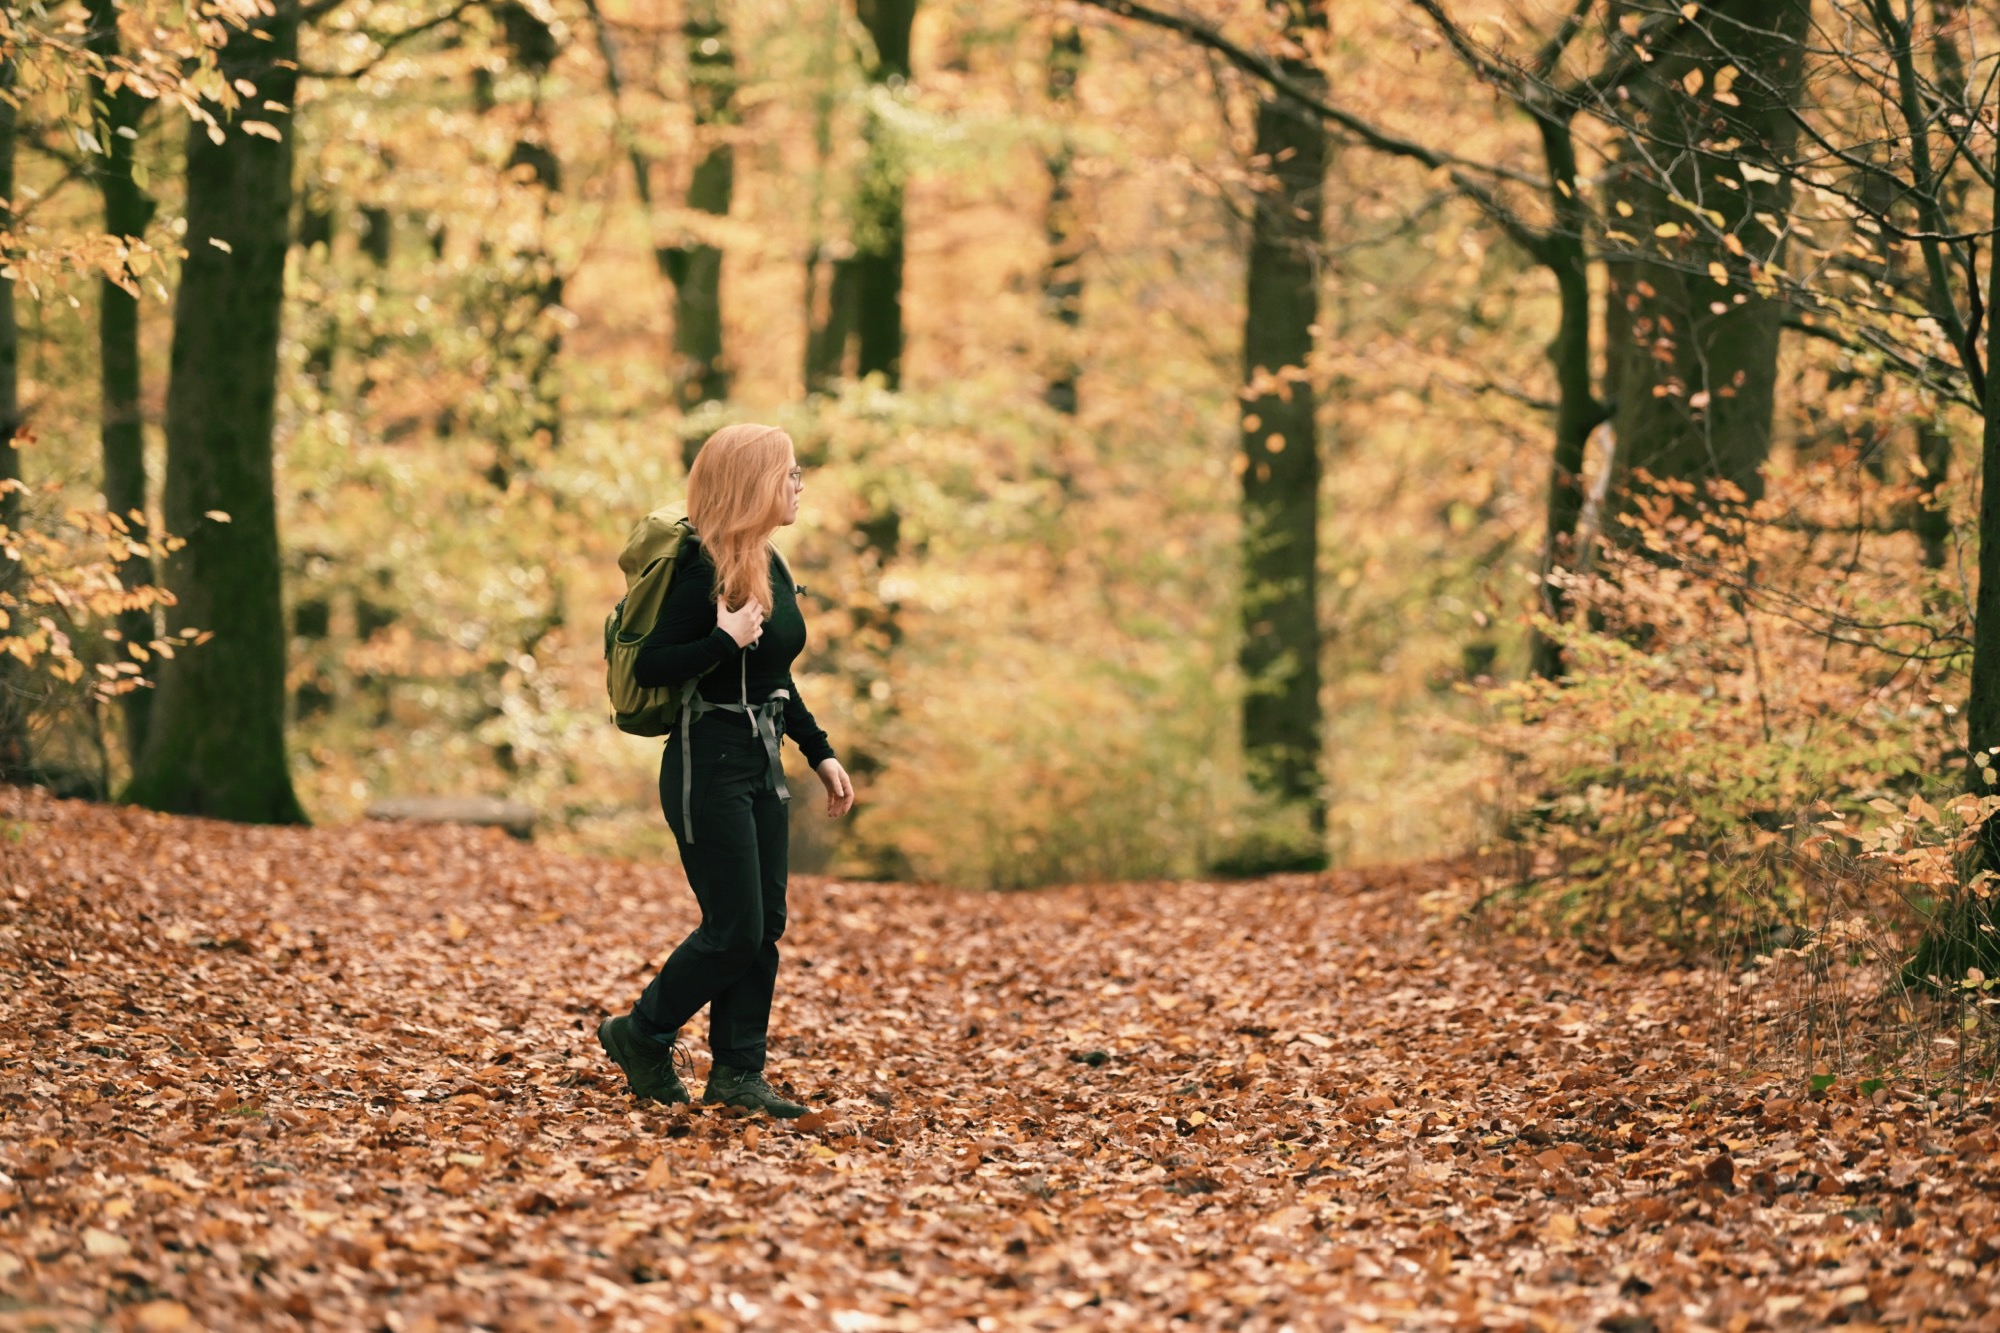
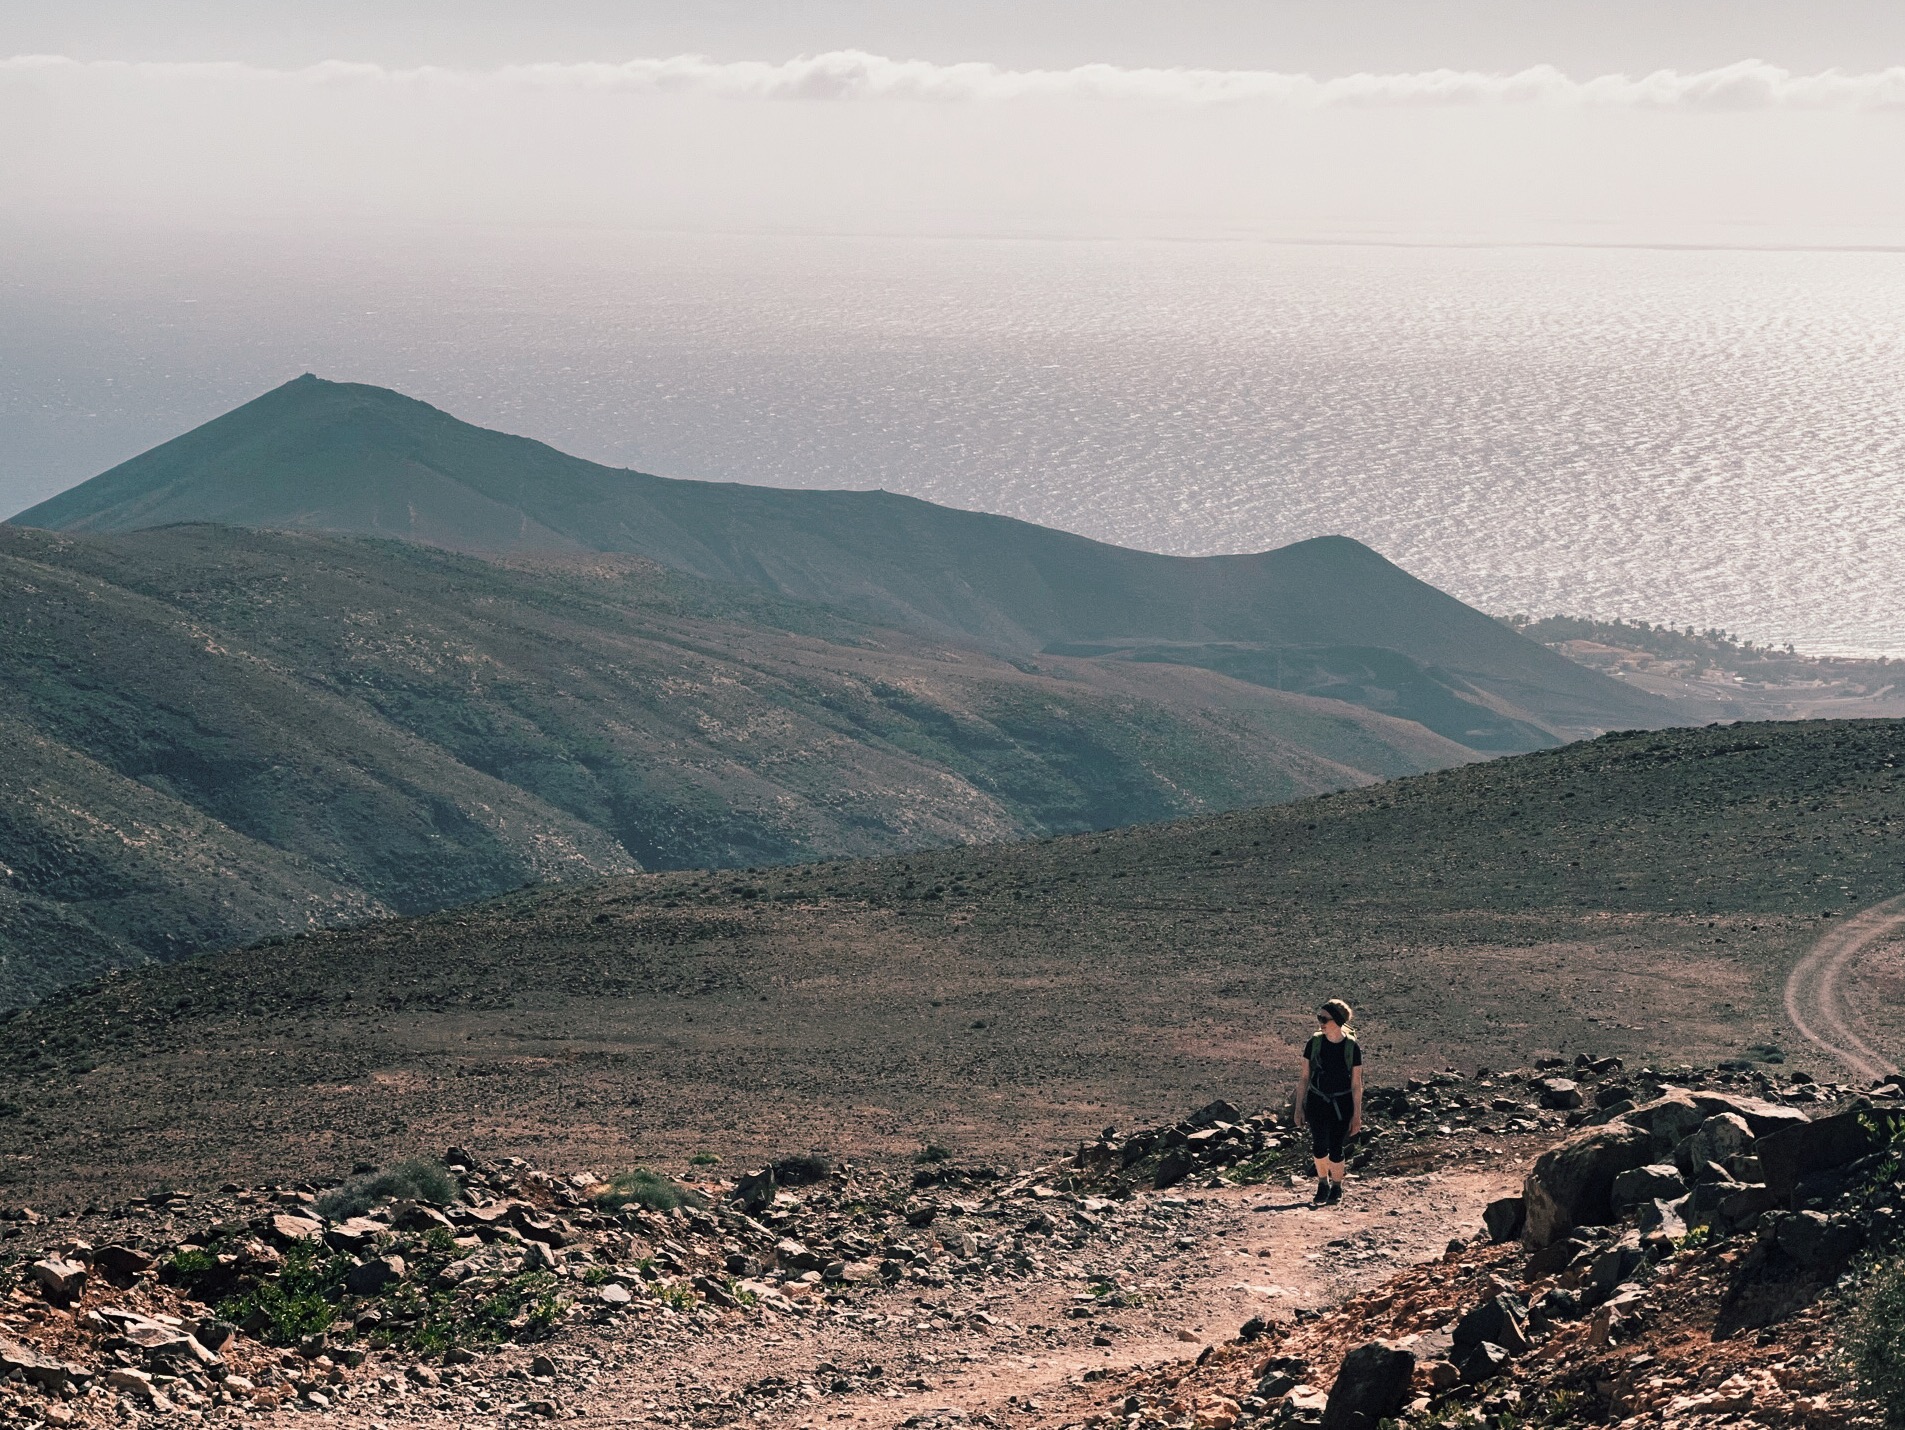
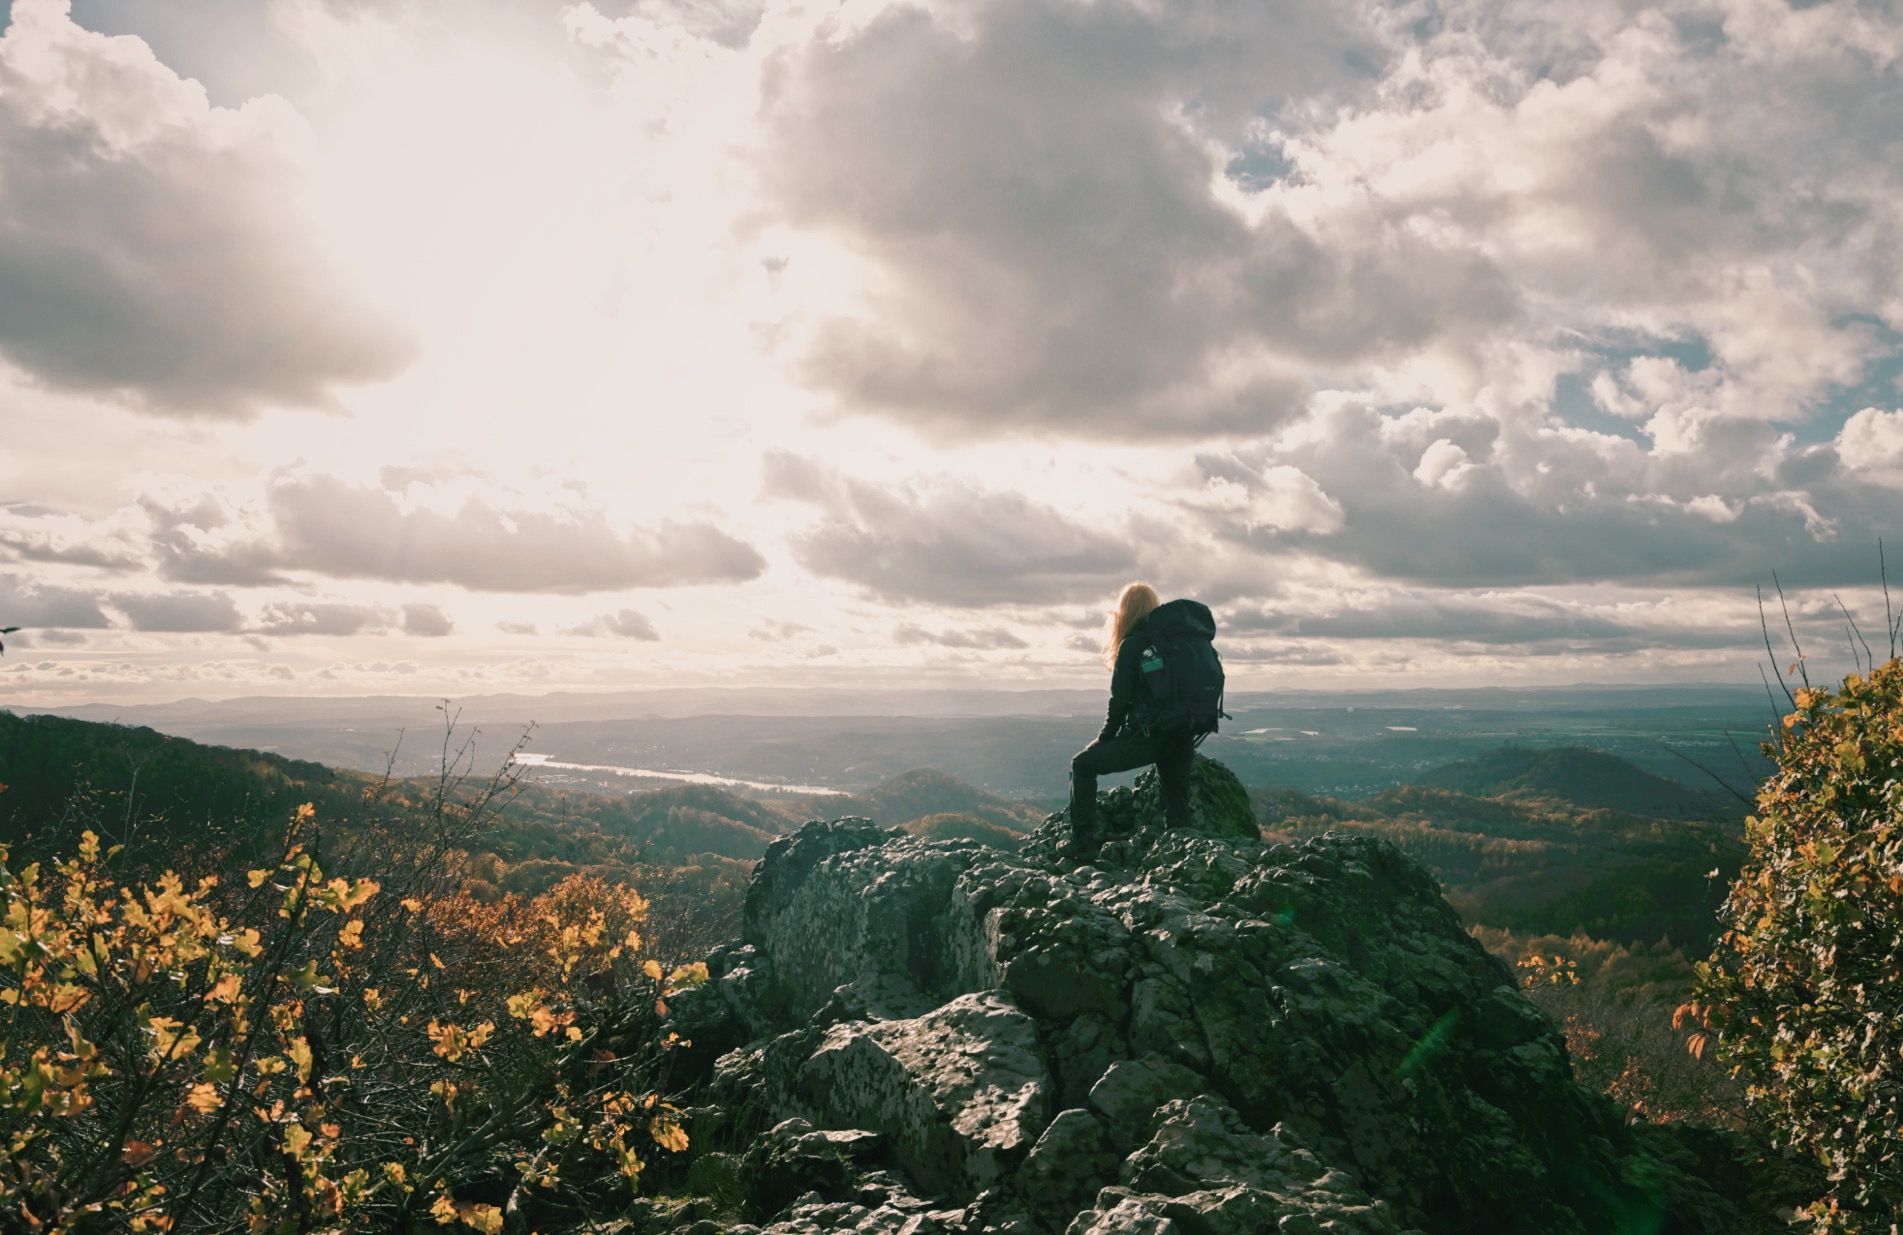
Setting out on a long-distance hike all by yourself is an incredibly rewarding and inspiring adventure. But it can also be quite scary and the planning and packing overhead might seem overwhelming. However, I think it’s so important to never let relatively small problems like this get in the way of experiencing big adventures. I walked a long-distance trail, crossing 3 countries in 5 weeks, never having done a thru-hike before. But I really wanted to do it. So, I planned and prepared and headed out. And it worked! Not everything went according to plan and I had to adapt here and there. But I got there, safe, well, and feeling unbelievably accomplished, free and inspired. So I know you can do it as well!
To help you with some of the planning, I’m sharing my experience and learnings in regard to packing for a long-distance hike. I’m especially focusing on female hikers, who are planning to set out on their first thru-hike by themselves (just like I did). But obviously, most of my learnings can be useful for anyone planning an outdoor adventure.
What Does Packing “Reasonably Lightweight” for a Long-Distance Hike Mean?
When packing for a long-distance hike, it’s very important to carefully plan what you’re taking. With every item you pack, you need to consider the tradeoff between being well-equipped for your adventure and carrying additional weight. The weight of your backpack is a crucial success factor on any thru-hike. But packing “ultra-light” can also mean a lot of stress and pressure. Ultra-light gear is very expensive, you need to make a lot of sacrifices to the point that hiking becomes less enjoyable, and you need quite some experience (a.k.a try & error) in order to find the perfect set-up.
From my personal experience, I think there is a fair middle ground between going crazy to pack absolutely ultra-light and packing so much so that the weight you carry becomes unbearable. I call it: Packing reasonably lightweight. That’s what I want to share with you in this post.
What to consider for Packing as a Solo Female Hiker
As a (solo) female hiker, there are a few additional considerations to packing for a long-distance hike, which most guys normally don’t (need to) consider. For example:
- Safety equipment is a key factor that many women think about first when planning a solo hike
- Most women require a different set of toiletries and hygiene essentials, from period products to shampoo for long hair
- Our bodies are in many aspects quite different, for example:
- Statistically, women’s comfort temperature is a few degrees warmer than that of men - meaning women get cold quicker than men do. Thus, women might need to pack warmer gear and clothing on a hike.
- On average, women are shorter and lighter than their fellow male hikers, thus their backpacks should also be considerably lighter.
- A lot of hiking gear is tailored more to the physique of a typical male body and thus often isn’t suited well for female hikers. Although this is slowly changing and you’ll find a larger variety of gear for all sorts of body types and requirements.
Many of these factors are a bit difficult to estimate and work with, and there’s still relatively little advice and information out there. That’s why I want to share my personal experience, tips, and tricks from my adventures on various trails - especially for other women who want to take the leap and set out on the incredibly rewarding journey of hiking a long-distance trail all on their own.
How to get started on packing?
The best starting point is to get all the information you can on the hike you’re planning to do. Otherwise, you won’t be able to pack the right gear. Here are some questions to get your research process started:
- What temperatures & weather will you be expecting during your hike?
This will greatly influence the clothes and gear you need to pack, e.g. rain gear, crampons, and sun protection. - What terrain are you up against?
This will help you decide what kind of shoes or hiking poles you need and how heavy your backpack can be. - How remote is the hike?
An important consideration in terms of safety equipment, food & water supply, navigation, etc. - Where will you spend the nights?
This obviously greatly influences your packing. Will you need a tent & sleeping bag or are you staying in ho(s)tels along the way? - How will you refill your food & water supply?
You need to know this to determine what kind of food you take and also the best gear set up to secure your water supply - Who are you? What are your personal specifics & needs? What’s your personal experience and fitness level?
These questions enable you to highly personalize your packing list. They might be a bit difficult to answer if you’re just starting off, but it will definitely get easier with experience. And there’s always more to learn. Here are some examples: If you’re short, you can easily save weight, by packing a shorter sleeping bag. If you have a specific medical condition, you need to make sure to pack the right medication. Depending on your fitness level you could decide on sacrificing some “comfort items” for a lighter pack, which will make the hiking itself much more enjoyable.

How to Pack (Reasonably) Lightweight for a Thru-Hike as a Solo Female Hiker
Once you’re clear on what you’re up against, the real fun starts: getting your gear together. But where to start? To make planning your packing easier, I structured this into core categories to consider. And to make this more tangible, I’ll also share an example of my personal packing list and learning when hiking 5 weeks along the Alpe Adria Trail (if you want to read more about the Alpe Adria Trail, check out this article).
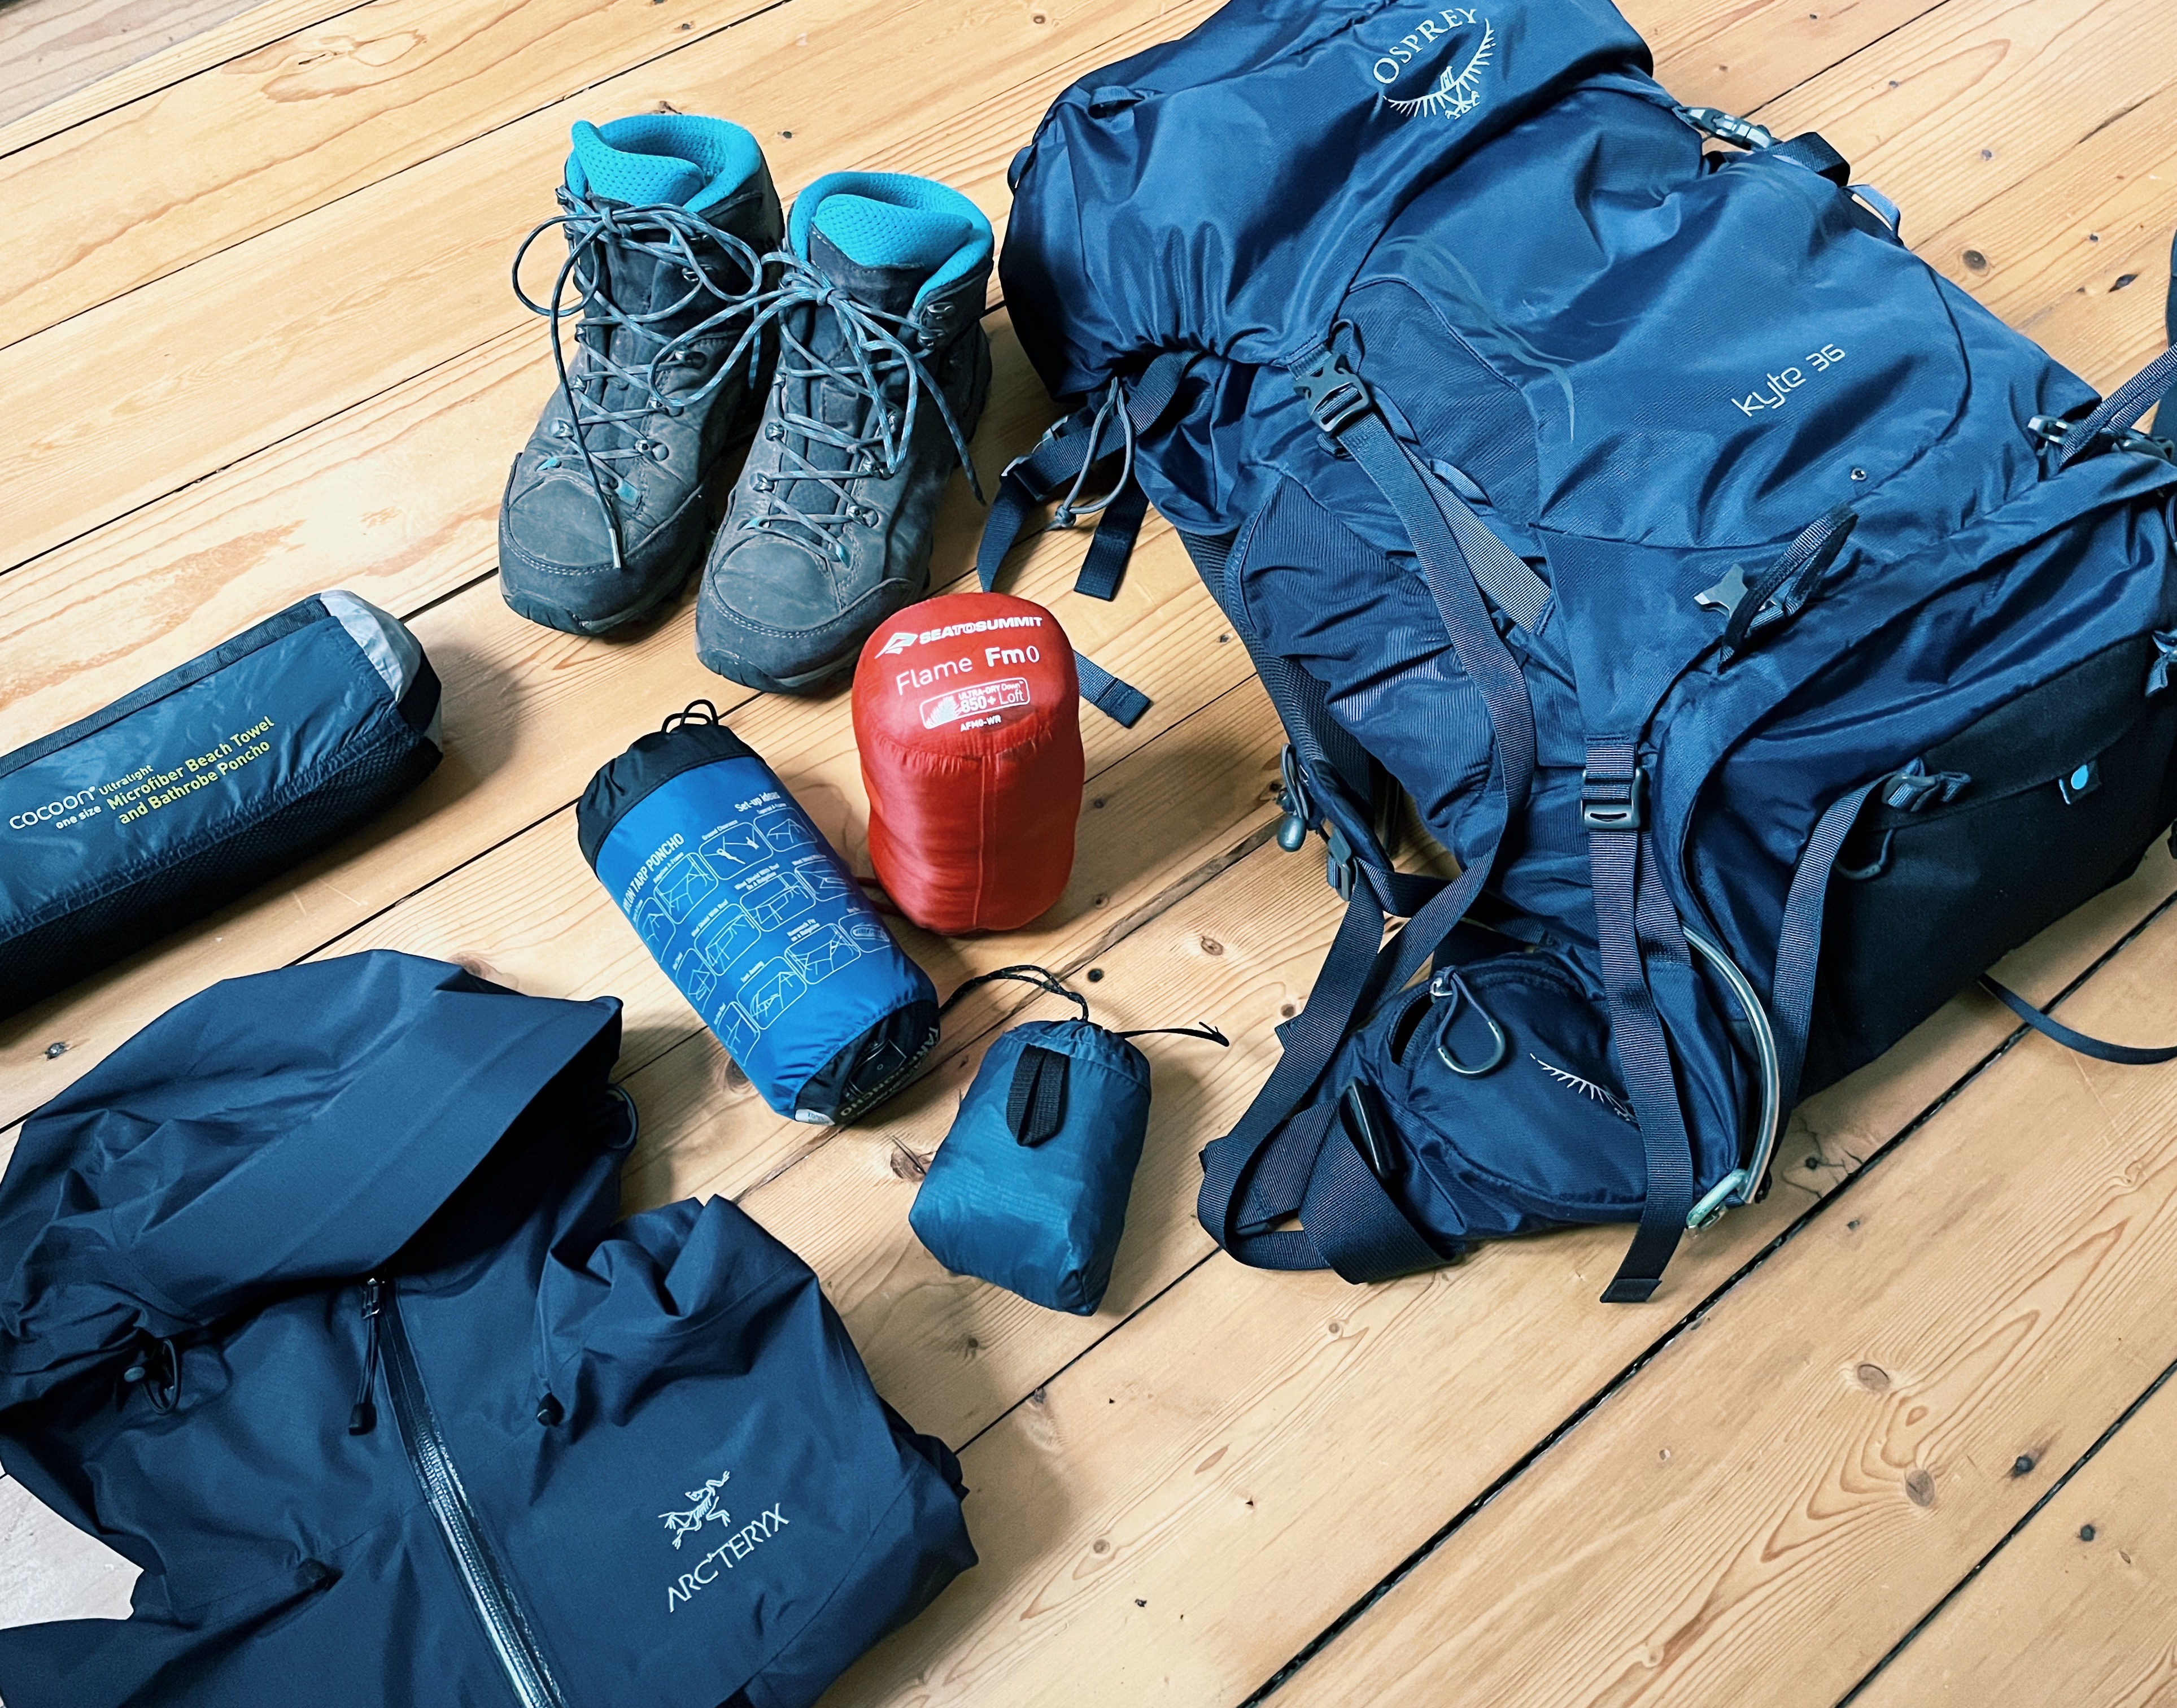
Essential Hiking Gear
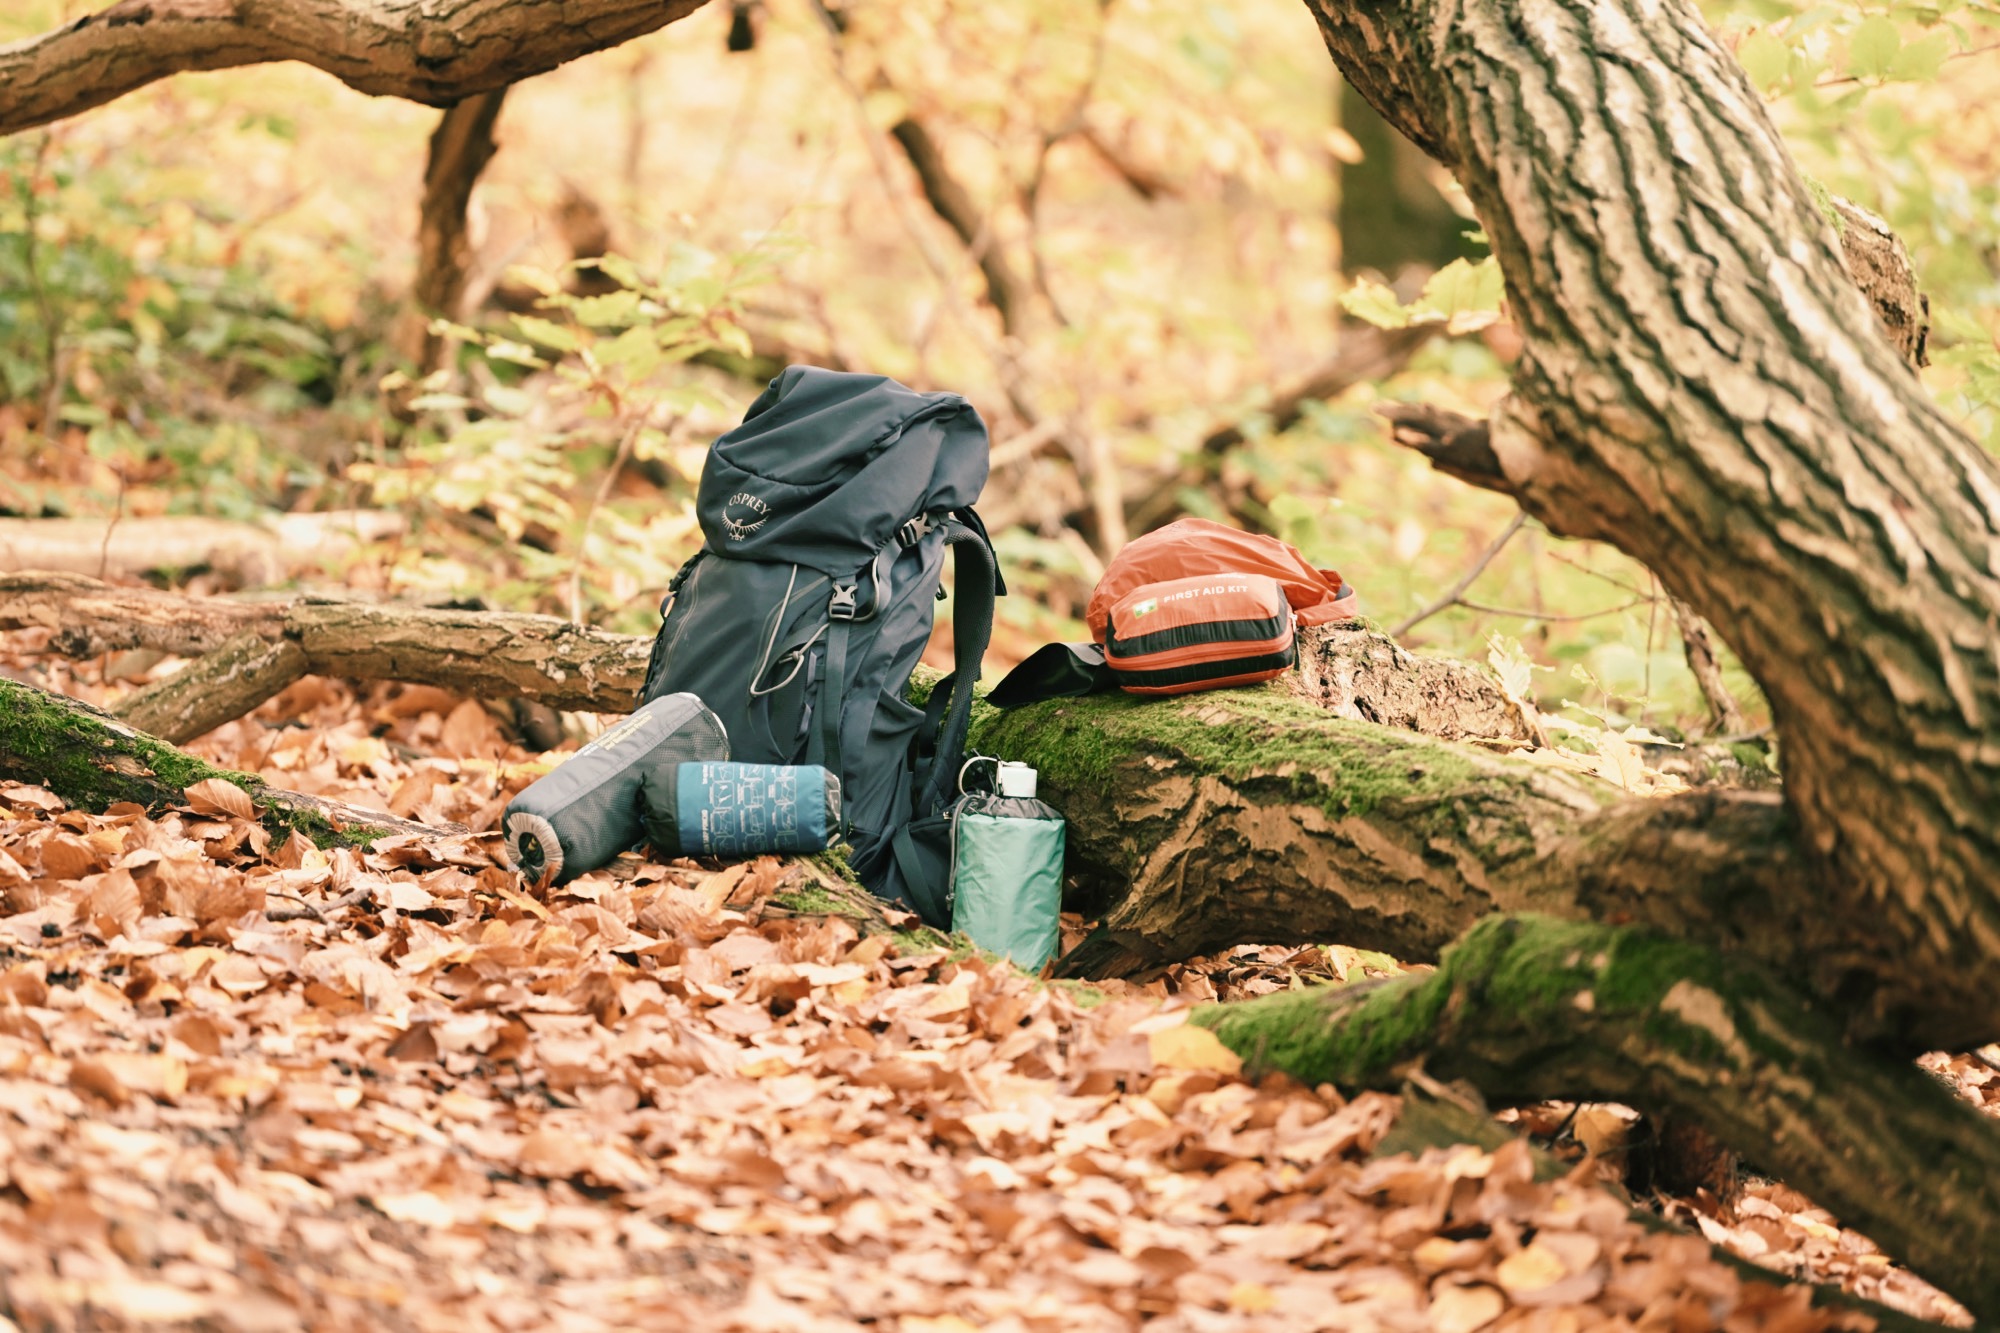
On a thru-hike pretty much everything you take should be considered „essential“ in one form or another. However, there are a few items that I‘d consider essential for hiking. These include your backpack, hiking boots & poles, and shelter (for camping or for emergencies). If you need to get new gear, I’d always recommend focusing on the highest quality you can afford for these items. I know this is the most expensive gear on the list and it might seem a lot to spend a few hundred bucks on a backpack, but it’ll so be worth it, for both your health as well as your comfort. Also, these items could easily last you a lifetime. Thus, a great hack is to buy high-quality gear second-hand, rather than new cheap, low-quality gear. And many times even high-quality brands have sales or special deals, e.g. Black Friday or winter/summer sales.
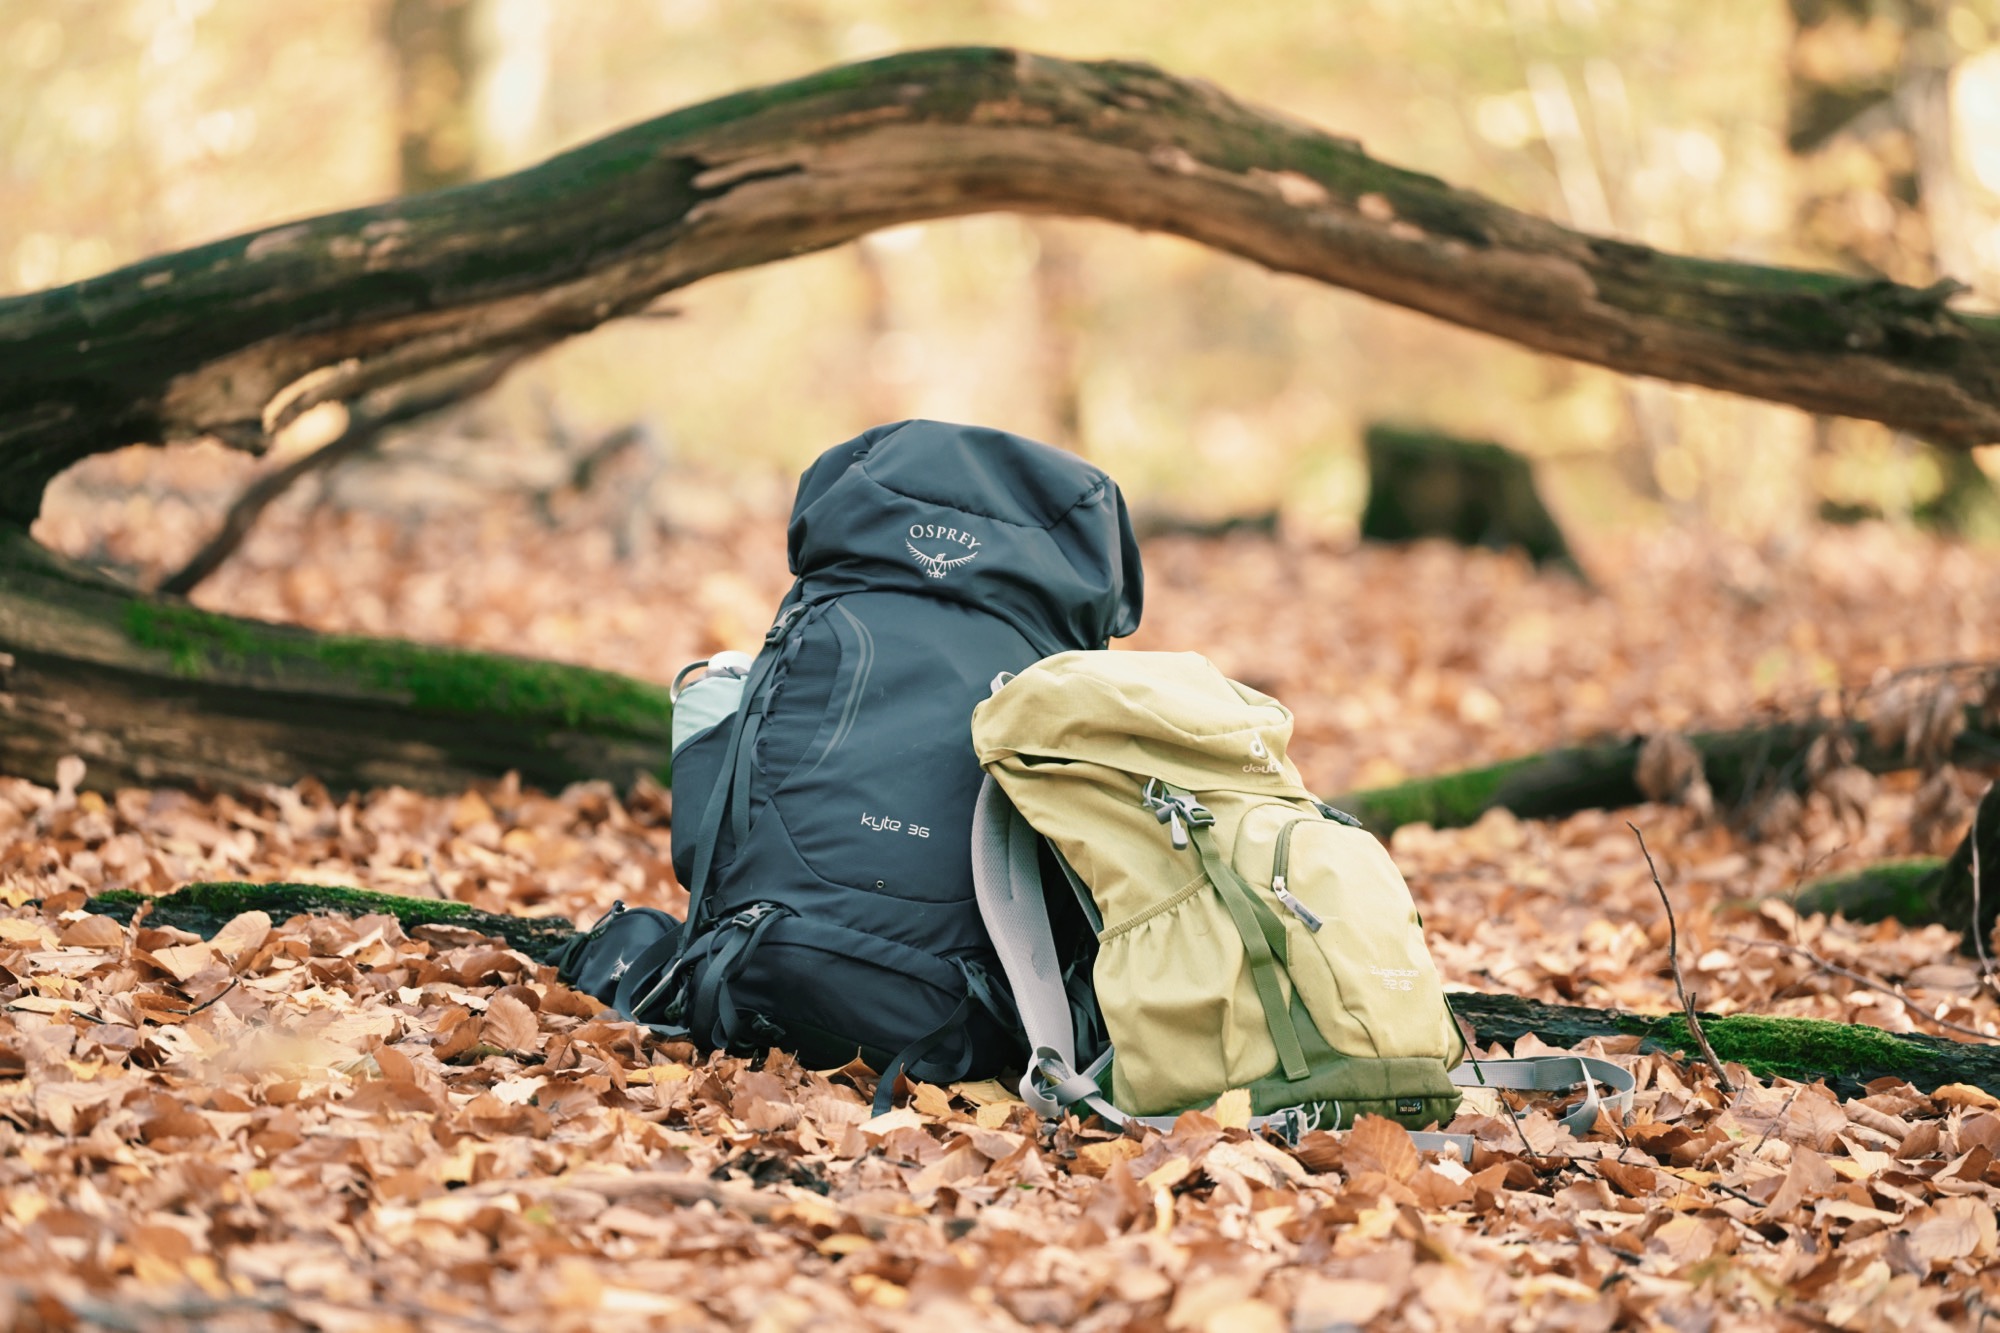
Backpack
For your backpack, it‘s very important that it fits your individual body type, so I‘d recommend going to a specialty store for some professional fitting advice. There’s quite a broad selection of backpacks shaped especially for women, which can be a real game changer. You can easily save quite a bit of weight if you choose a backpack made of high-quality, lightweight material. Also make sure it’s large enough to fit all your equipment, but not too large - no need to carry additional fabric around.
I have personally made really good experiences with the brand Osprey. The quality and functionality of their backpacks are incredible. On my backpack, the Osprey Kyte 36 I especially like the top part, which can add 2L of volume. I also love the two pockets on the belt which are perfect for fitting my phone, paper tissues, and some pepper spray if I‘m out alone in the wild.
Hiking Boots
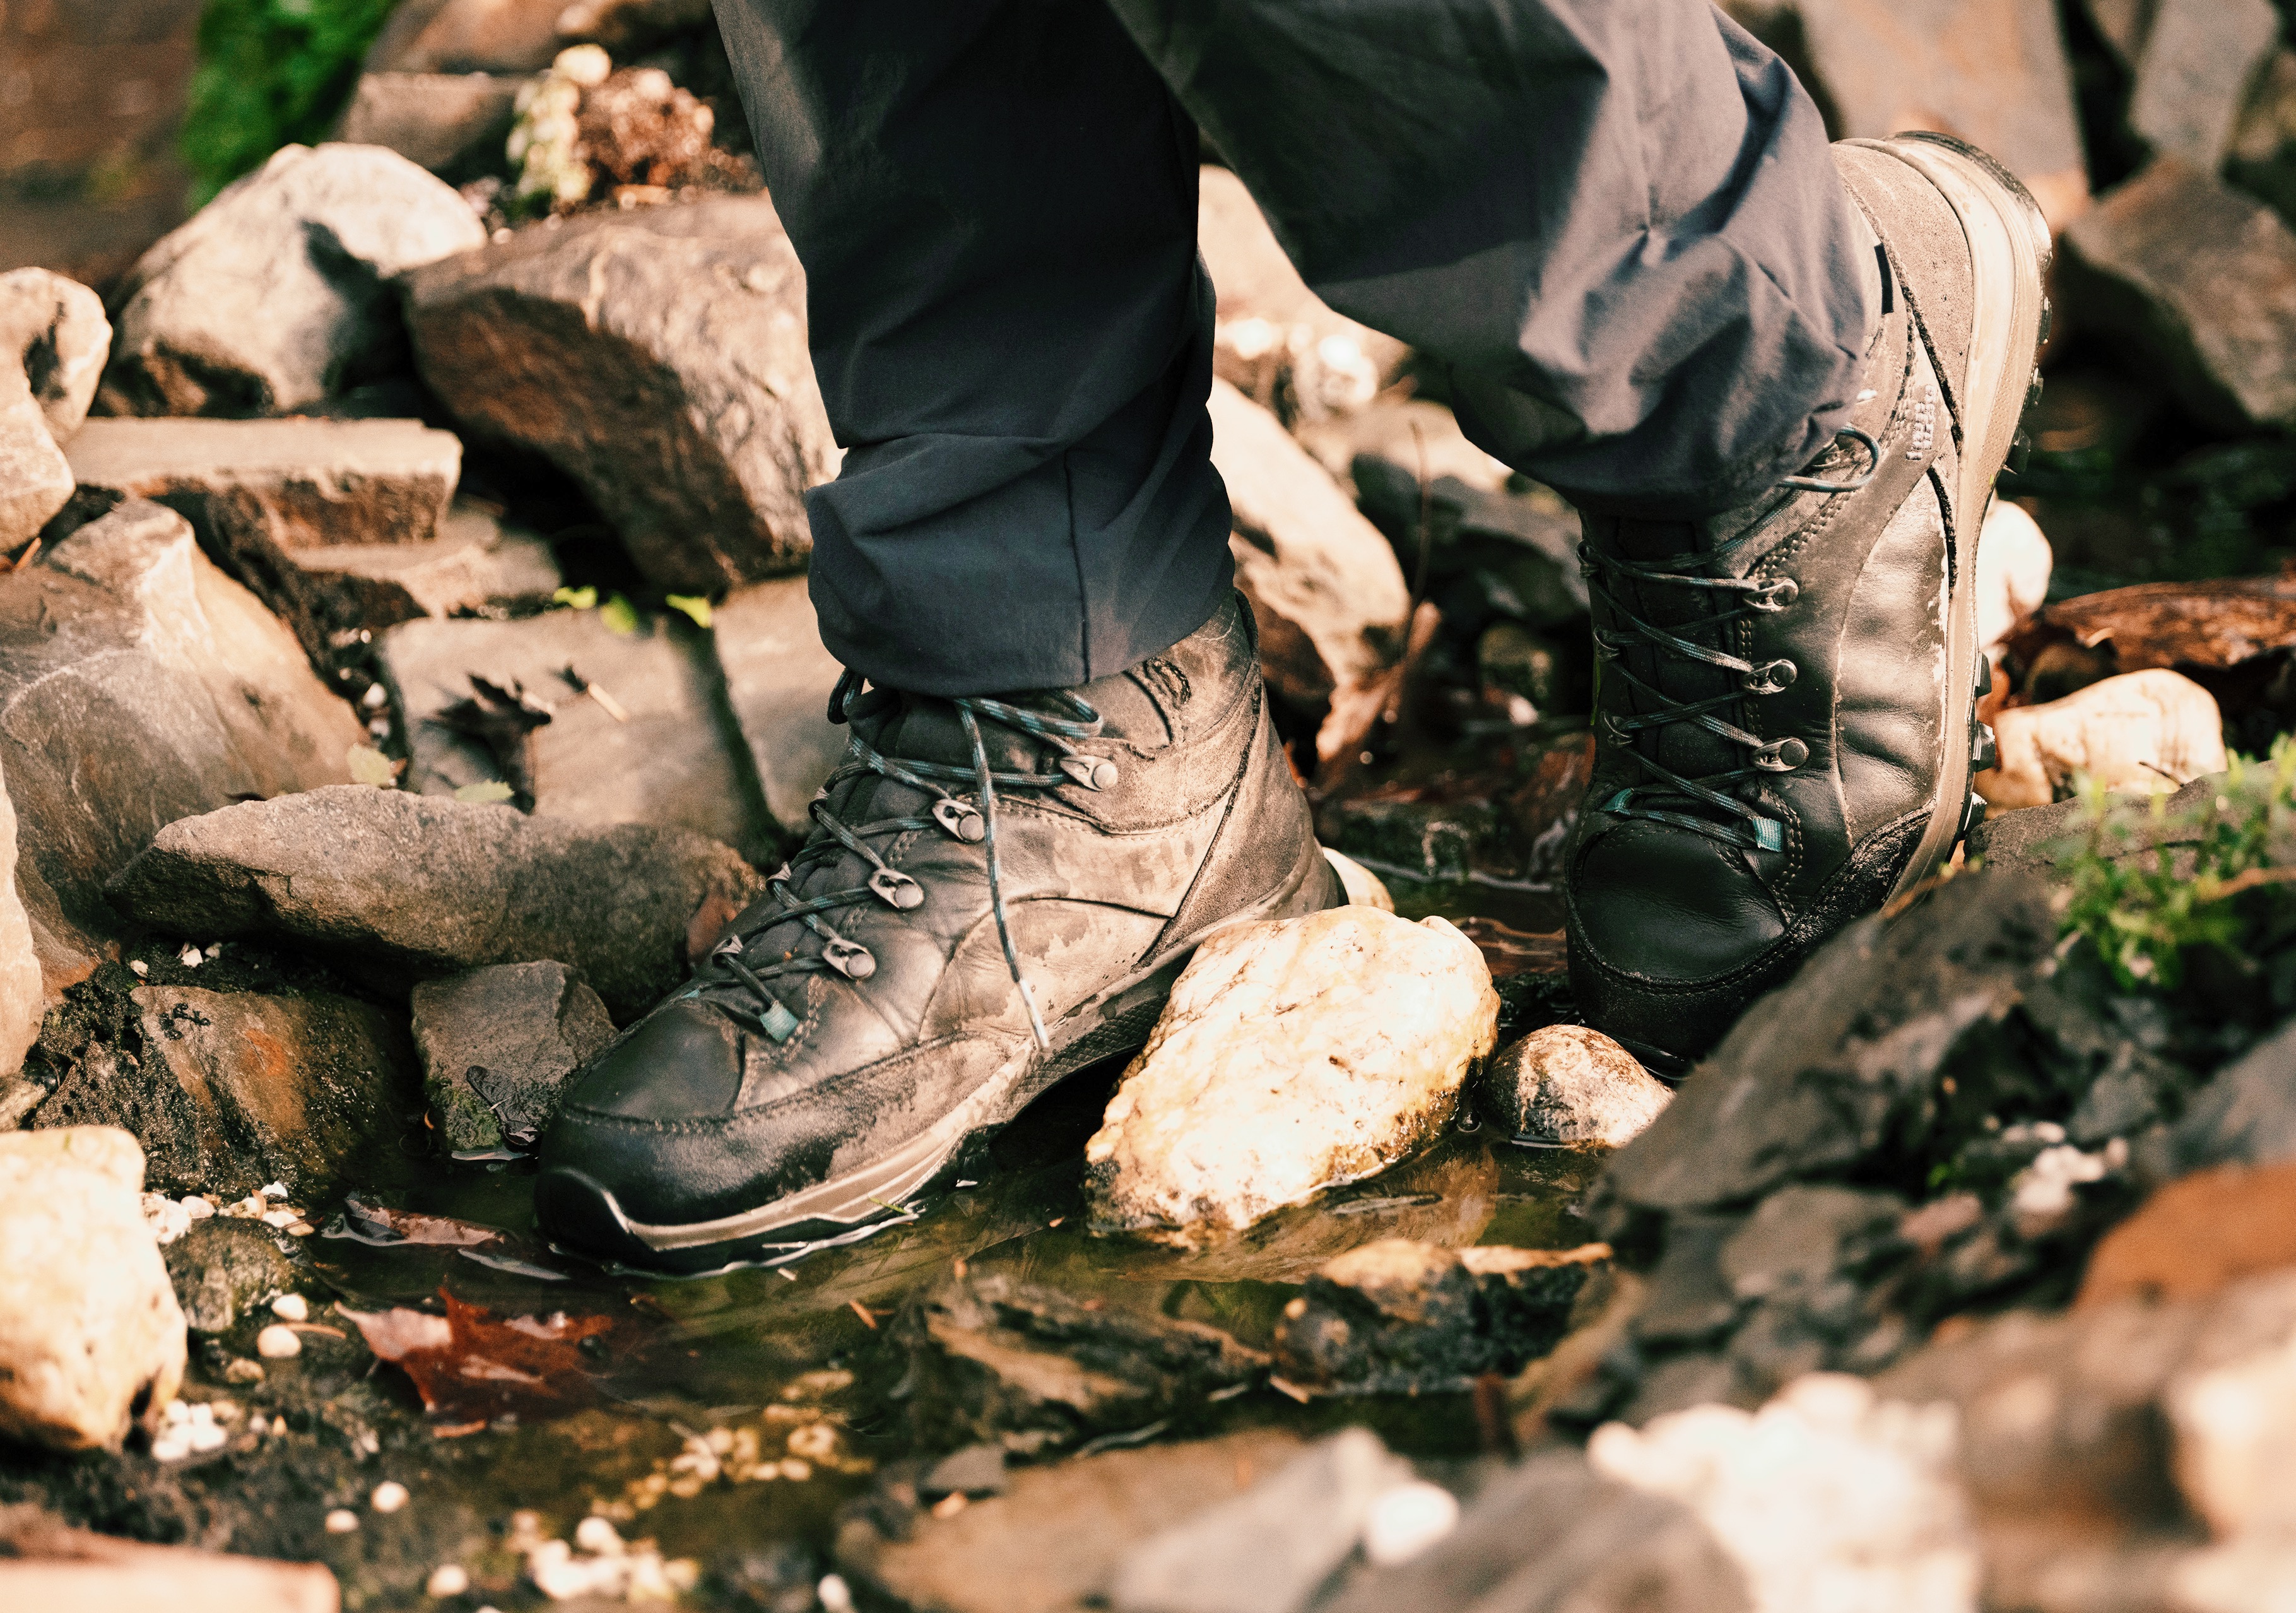
This is probably your most crucial piece of equipment. They’re on your feet every single day. For a long-distance trail, I would recommend keeping a close eye on the weight of the shoes, as this is the piece of equipment you need to move most. This means the heavier they are, the more energy you’ll need to move them around. Many people use trail running shoes instead of classical hiking boots as they are much lighter while still offering incredible grip and support. No matter which shoes you choose, the most important factor is that they fit you well. I’d choose a slightly heavier, yet better-fitting boot over a lightweight, uncomfortable shoe any day.
Hiking Poles
I definitely recommend taking hiking polls on any long-distance trail you embark on. Although it might feel a little funny at first, they can be a real lifesaver as they offer a lot of support, especially on steep descents. They are also great for balancing the weight of your backpack and distributing it across your entire body.
Shelter
There’s a saying that for a “proper shelter” you need a) something to sleep under, b) something to sleep on and c) something to sleep in. The extent to which you need these three items depends greatly on the trail you’re setting out on. If you’re camping, you’ll need a) a tent, b) some sort of mattress and, c) a proper sleeping bag. If you’re staying in huts or hostels you might just need a) a multi-purpose rain poncho, b) an emergency blanket and, c) a thin liner.
Daypack
This is a more optional item I’d say. However, it can be incredibly useful to have a small daypack with you. Especially if your stages end in a village or town, you might want to head out for dinner or to get some groceries. Obviously, you don’t want to take your huge backpack with you, so it’s really useful to have a small daypack on you. There are tiny, foldable ones made of super light fabric, which will add hardly any weight to your pack. The advantage over a plastic bag is that you can also take this if you’re doing a small walk or short hike on a rest day.
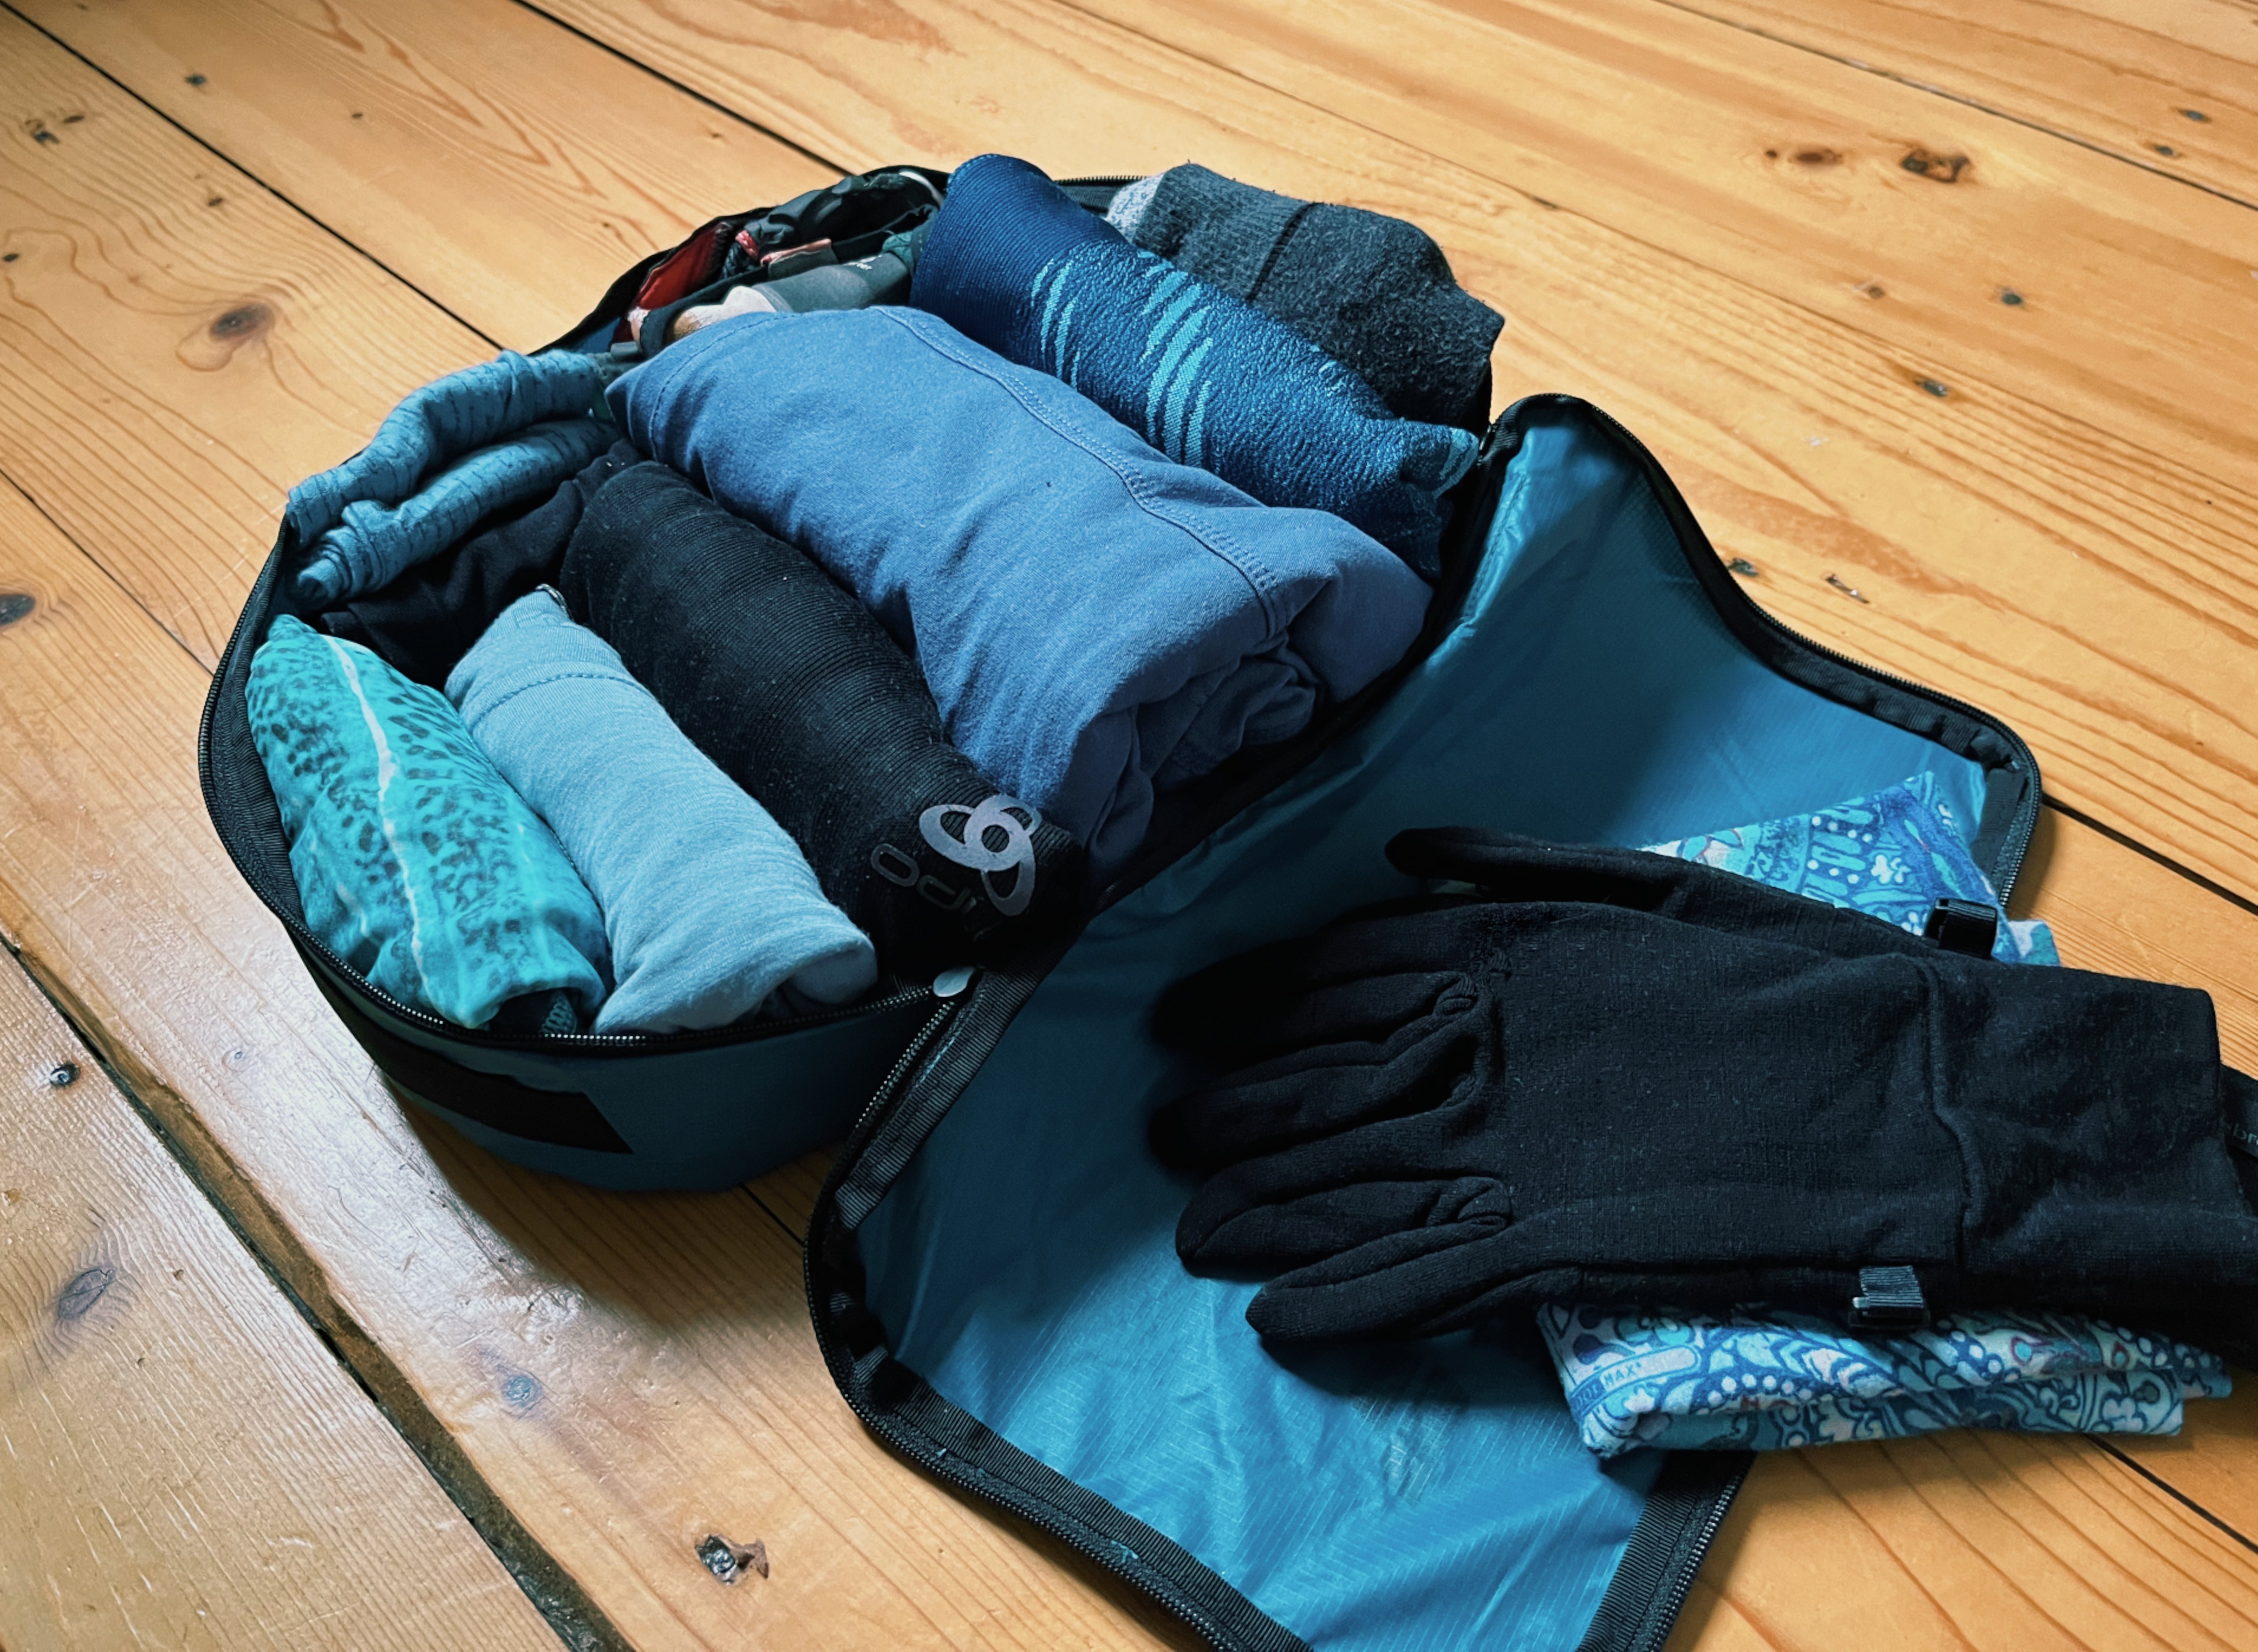
Clothing
As mentioned above, this is hugely dependent on the weather you’ll be encountering on your hike. But a few basics will always apply.
- Quality is king. Invest in high-quality clothing. Rather pack one high-quality item than 3 cheap ones. You’ll get a much better bang for your buck.
- Layers are the way to go. Pack so that you can layer pretty much everything. This will keep you warm in colder conditions and allow you to quickly adjust if the weather changes. You’ll always need a base layer (pants and a shirt) to which you can add layers depending on the weather. Warm underwear and a fleece jacket for cold days. A windbreaker or rainy and windy days… you get the gist. An additional hack: make sure all your clothes are in a similar color scheme, so no matter what you put on, they’ll always match. For example, combine blues and greys or blacks with one bright color.
- You’ll need less than you think you will. Every single time I find it fascinating to see how little I actually need on a thru-hike. It’s basically one set of clothes for hiking and one for not hiking. That’s it.
This is what a packing list for clothes on a several-week thru-hike in spring could look like:
- 2 merino wool long-sleeve shirts
- 2 pairs of hiking pants
- 2 pairs of hiking socks
- 1 merino wool t-shirt
- 1 (warm) fleece jacket
- 1 pair of long underwear (which can be used for yoga or stretching and sleeping as well)
- 3 panties & 2 sports bras
- 1 tube scarf
- 1 rain jacket and/or rain poncho
- 1 pair of light, merino wool gloves
Also, a great hack to save weight on clothes is to hike in late spring, summer, or early fall. With a warmer, more moderate climate, you’ll need to pack way fewer clothes.
I can highly recommend using pack sacks to transport and store your clothes. They protect them from rain & moisture. Multiple pack sacks also keep your dirty clothes separated from your clean ones (although, to be fair, there probably won’t be that many clean ones after a few weeks on the trail). Since I discovered packing cubes, I don’t just use them for my thru-hikes, but also for any kind of traveling.
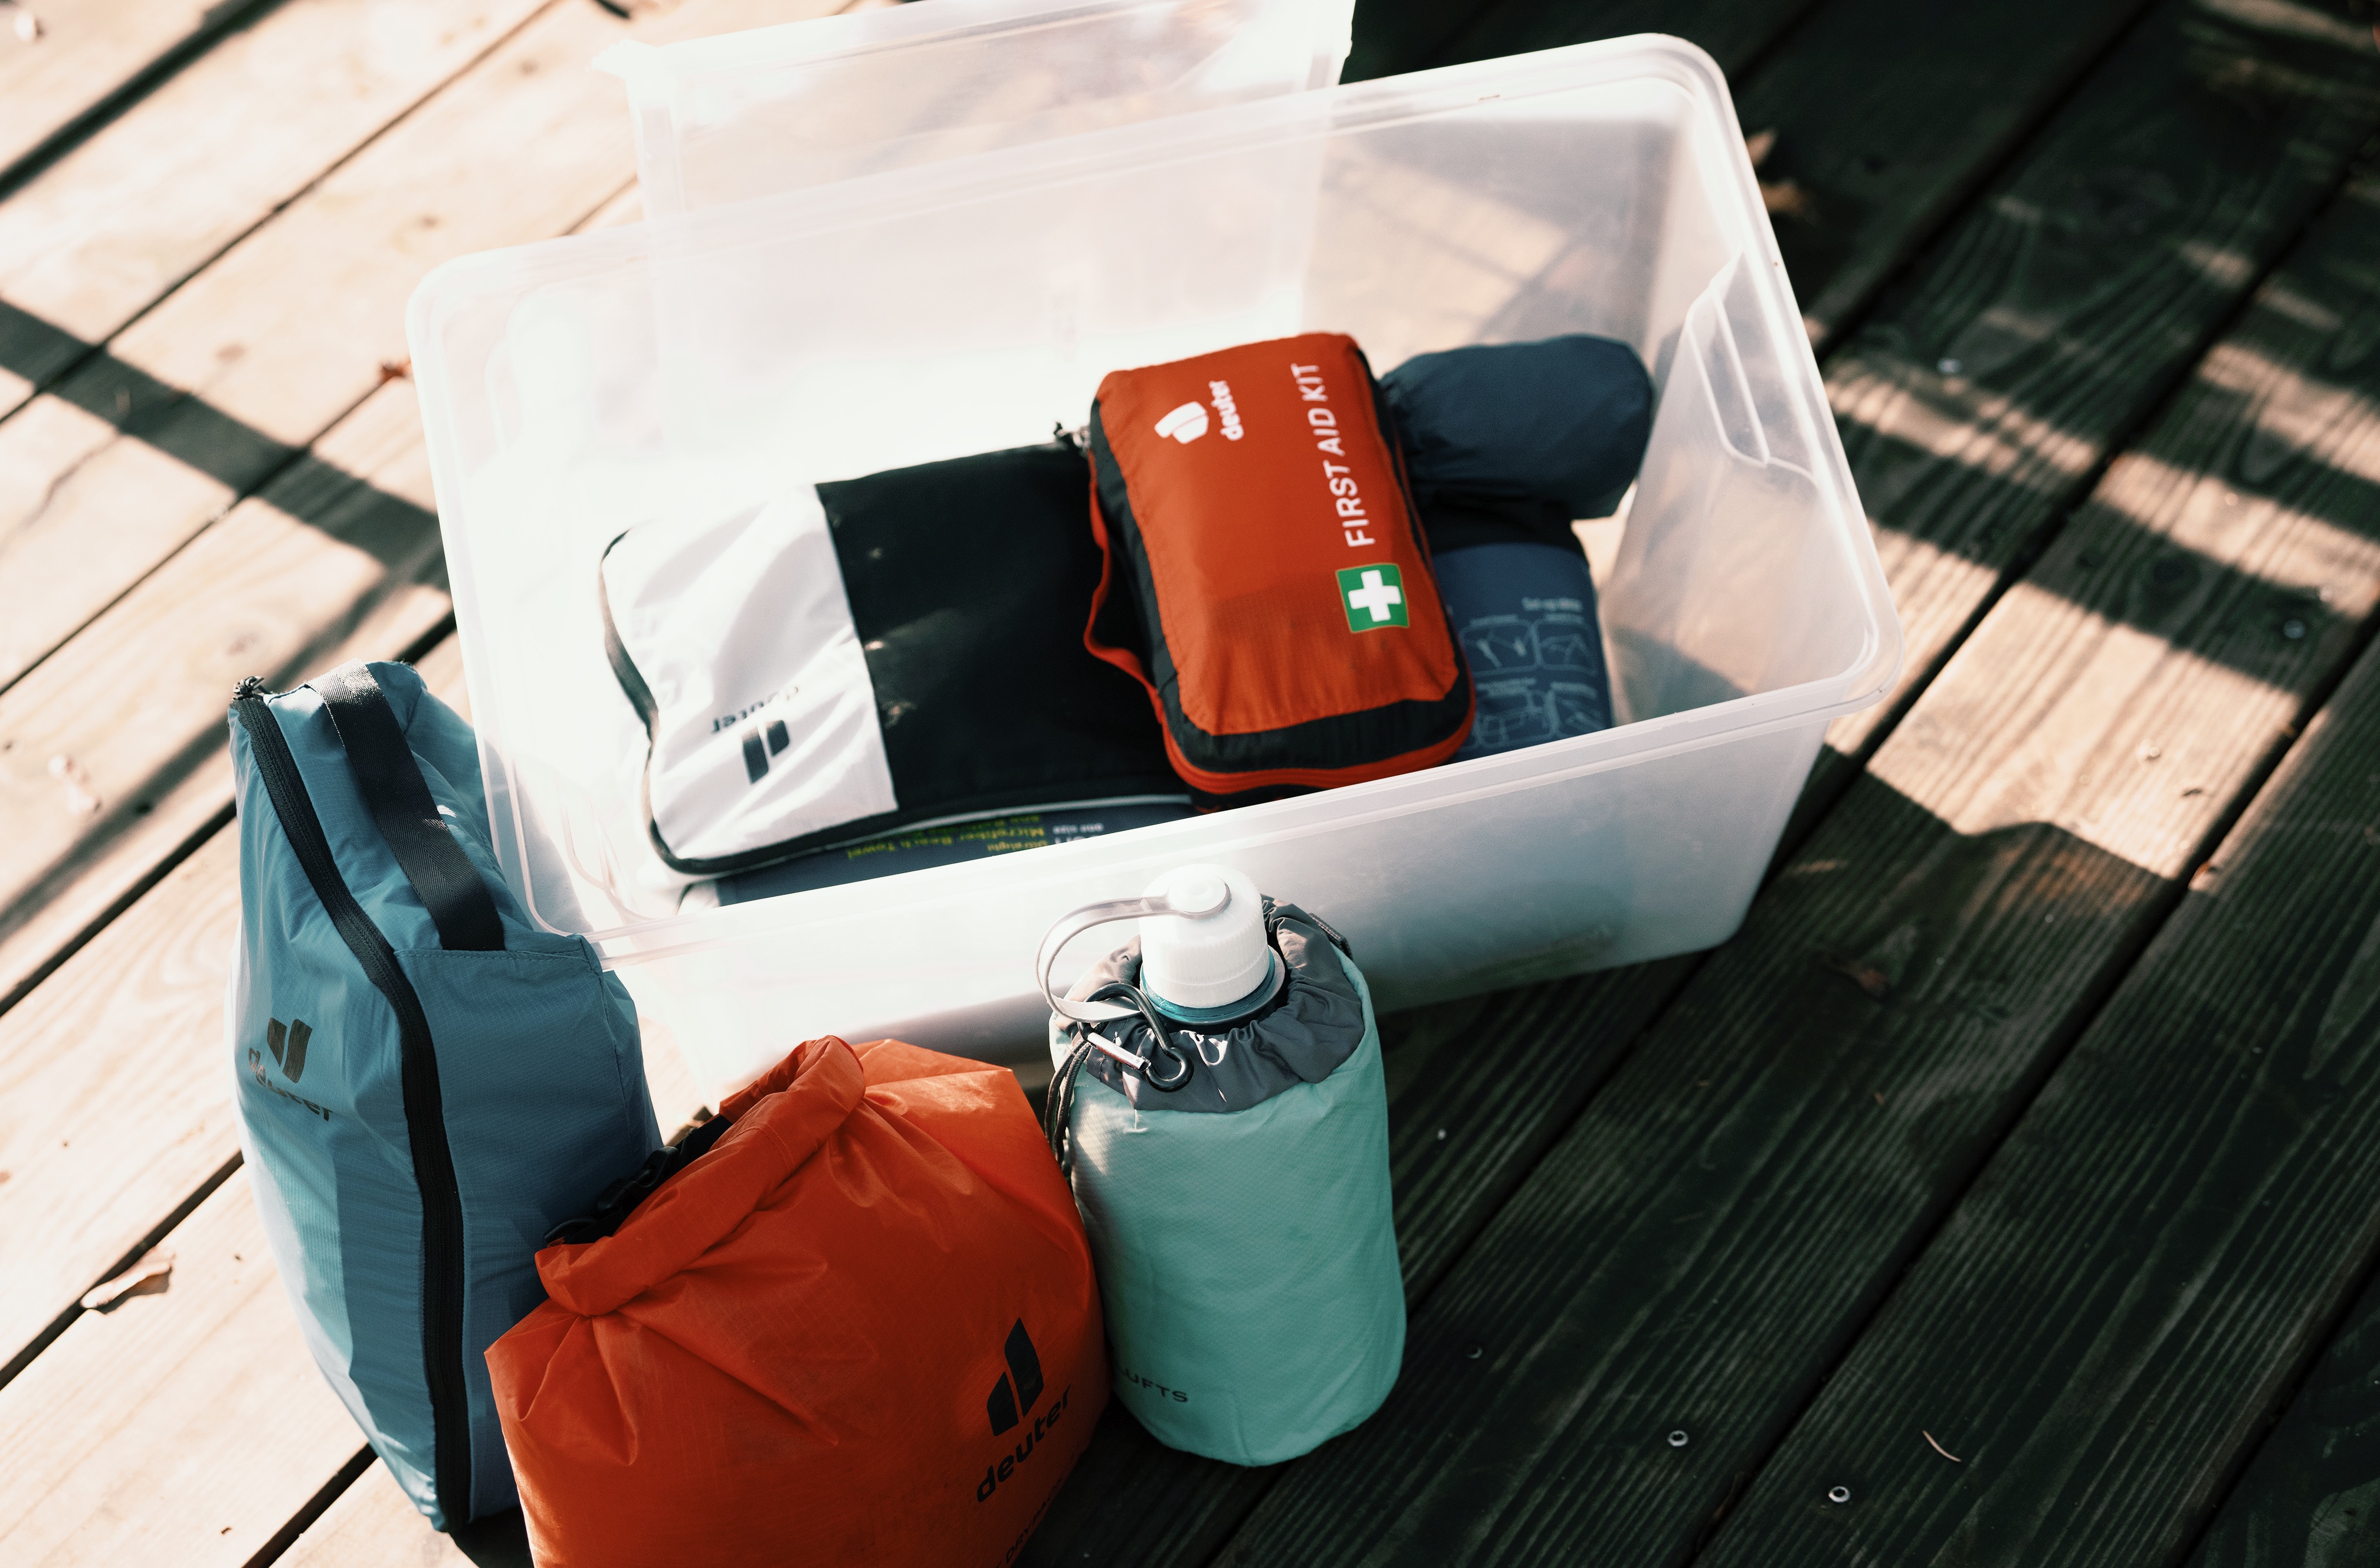
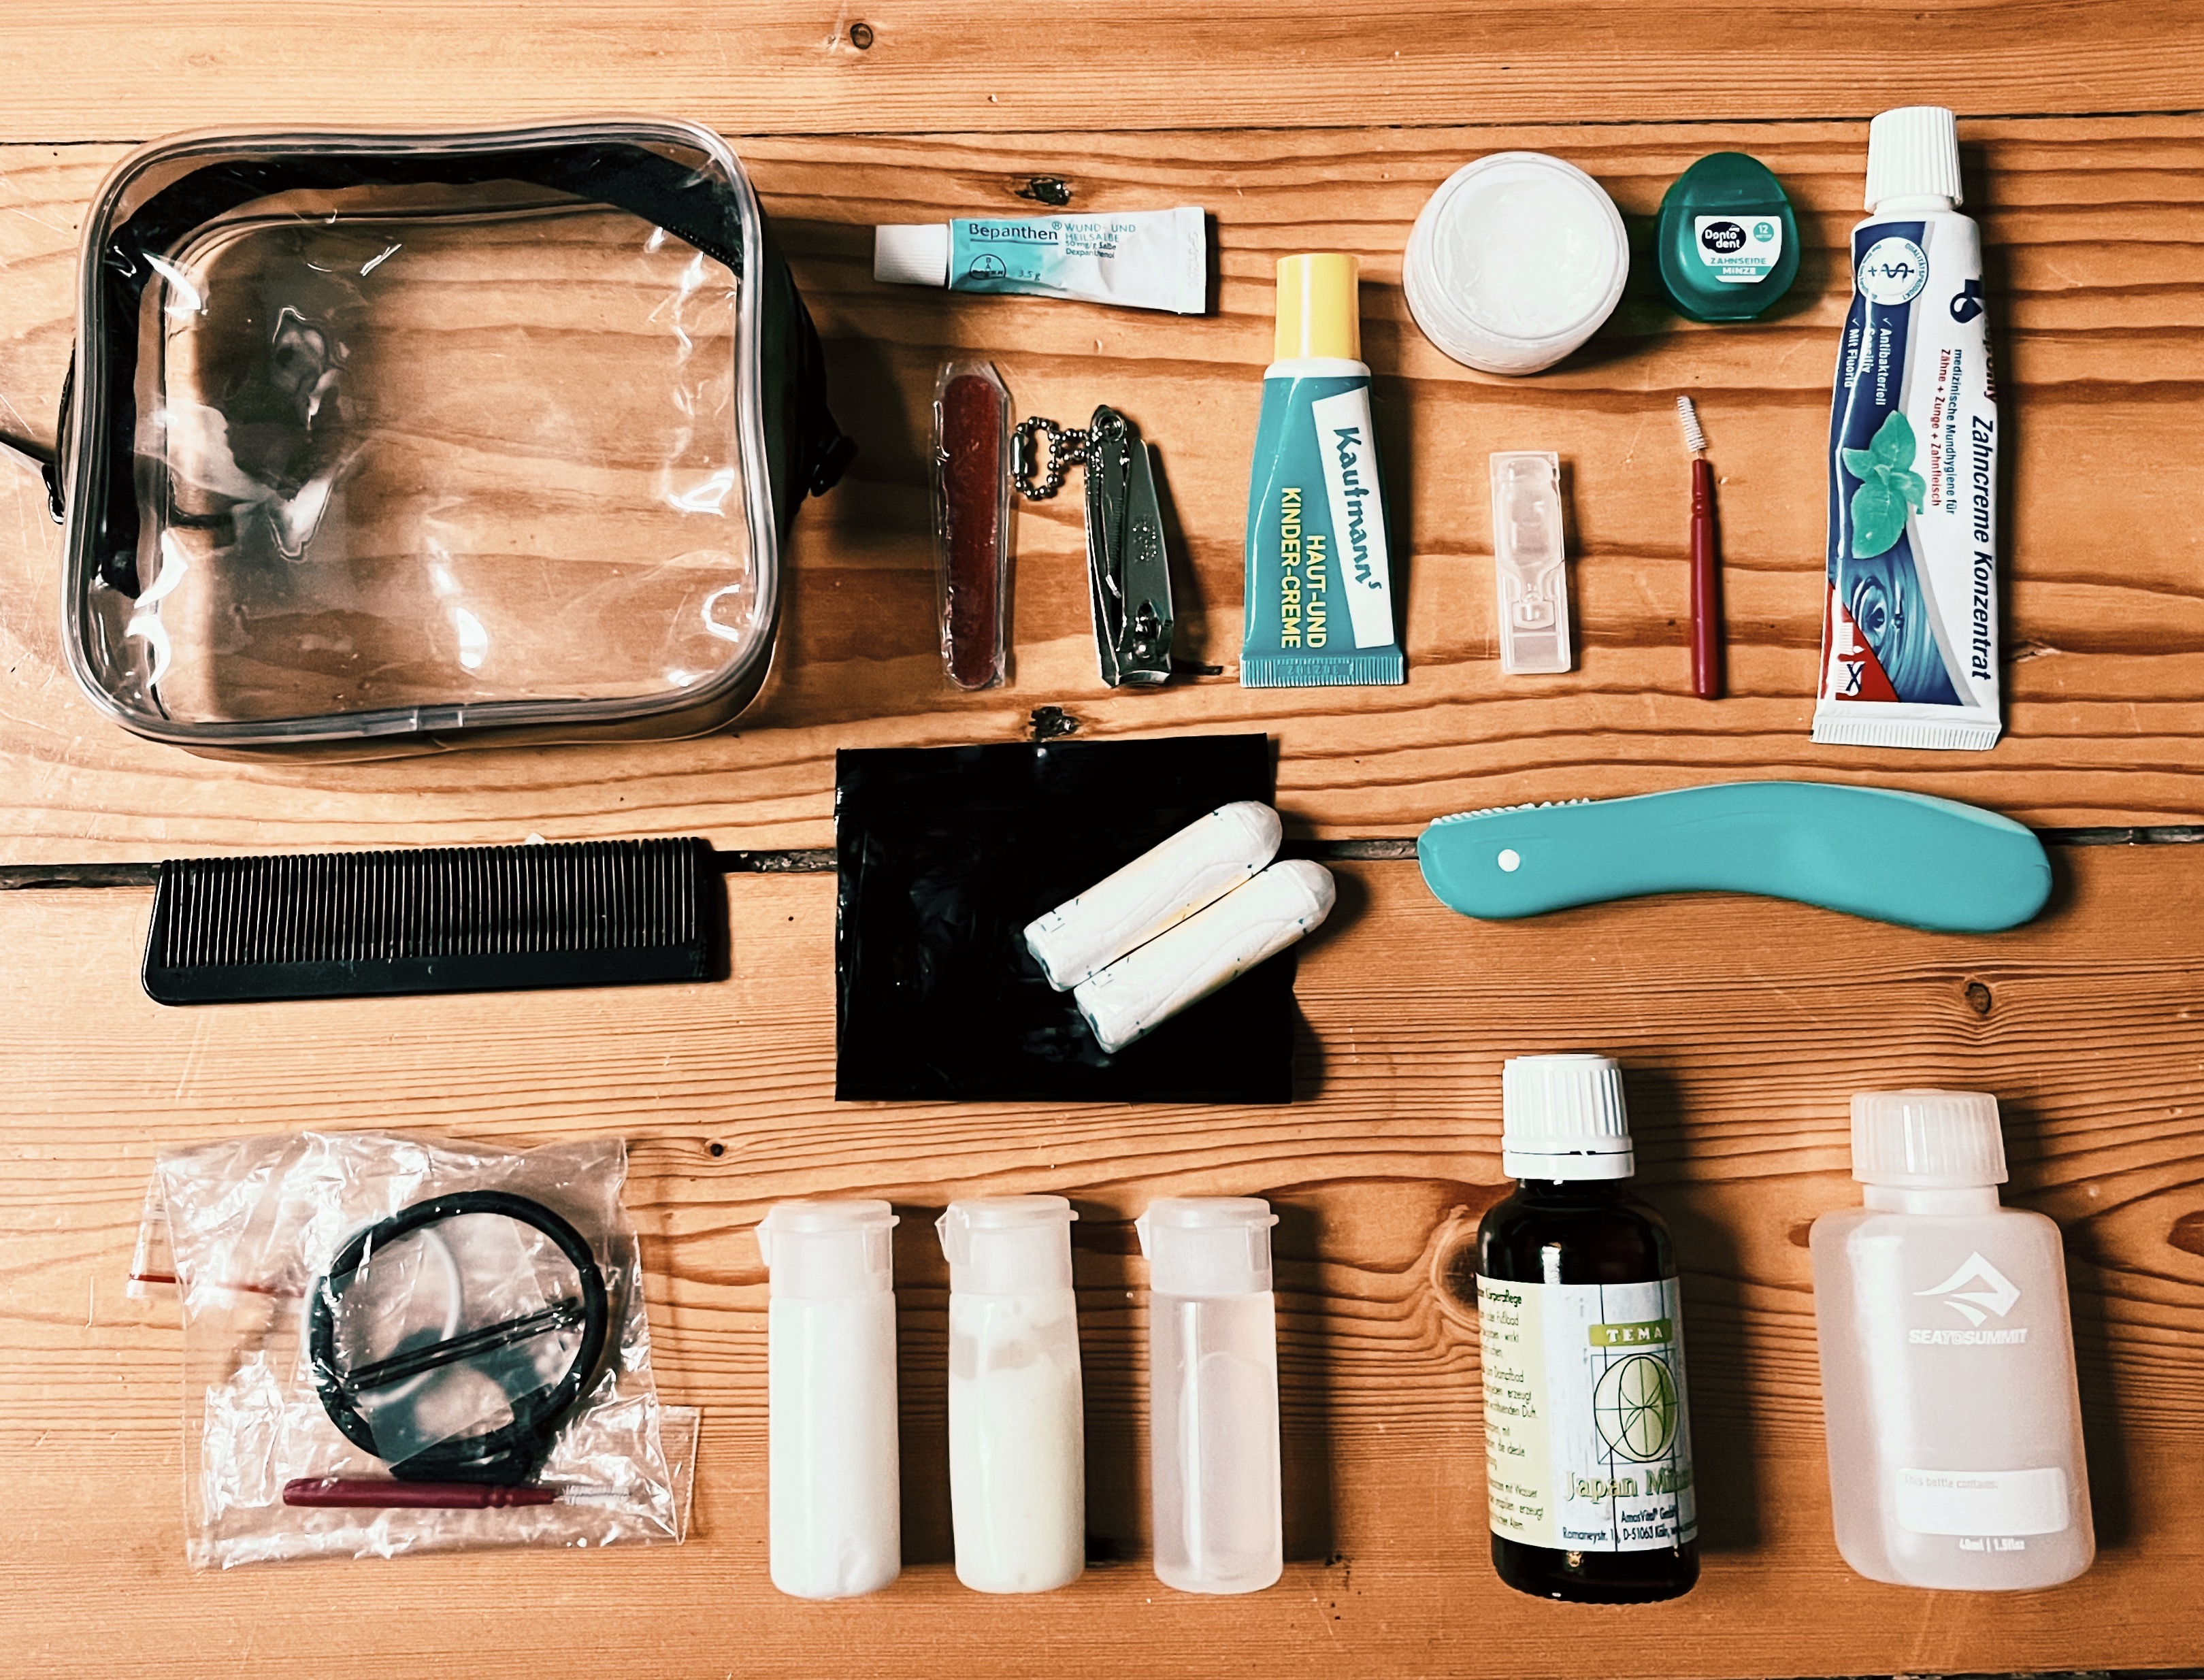
Toiletries & Sun Protection
Microfibre Towel
Microfibre towels are light and dry off quickly. Just what you want on a long-distance hike. There are different sizes, so consider the tradeoff between comfort and weight you want to make here. If you’re mostly staying in hotels you probably just need a very small towel for emergencies. If you’re on a hut-to-hut hike or staying in hostels with shared sleeping and bathroom facilities like you’ll find on the Camino de Santiago you might want to pack a 2-in-1 poncho microfibre towel.
Toiletries
Which toiletries you bring is very individual, depending on your needs and preferences. From my experience, you will probably need less, than you think you do. I fill all my toiletries into smaller containers of 5 - 20ml (which seems very little but definitely lasts me about 3 - 4 weeks). Another hack is to preferably pack products you can use for several purposes. For example, I use a liquid soap that theoretically has 18 different use cases. From washing dishes to clothes to washing your face and body (apparently, you can also brush your teeth with it, but I’ve never gone that far). I also take some body oil, which is more efficient than body cream. I like to carry this, in case my skin gets very dry, I get sunburned or I need to massage my sore legs and feet, but I know that most people don’t pack this.
Here’s an exemplary toiletry list from my thru-hikes:
- Toiletry pouch - I’d recommend a clear, sealable one
- Liquid soap (multi-purpose, 40ml) - I normally take a little more of this one as it can be used for nearly anything, but most importantly: body wash & shampoo, dishwashing, washing clothes
- Conditioner (5ml) - my hair just goes too wild if I don’t use conditioner for a few weeks straight
- Toothbrush (foldable) & dental floss
- Toothpaste concentrate (10ml) - this stuff is incredible. You honestly just need one drop so this small tube will last you forever.
- Deodorant (ca. 8ml) - I use cream rather than spray or liquid, as it’s way more efficient, meaning I need to take less.
- Face cream (5ml)
- Lip balm (3ml)
- Bepanthen cream (3ml) - which is basically my go-to emergency treatment for anything from spots to blisters or scratches
- Hair ties & clips
- Your preferred period products - I always take one or two small, sealable hygiene bags, too, in case there’s no toilet in sight when you need it (which is very likely, depending on the hike you’re on).
- Comb - I bring a very small comb instead of a brush, which to be fair, is a little inconvenient if you have long hair. But it does save weight and space.
- Nail clipper - ideally one with a small file attached
- Paper tissues - I normally just take one small pack for emergencies. If you’re staying in huts or hostels along the route, you can take some toilet paper from there every morning. Also, make sure to have a small plastic bag on you in which you can take any used toilet paper to the next hut or trash disposal.
- Hand sanitizer - I have a small 5ml tube for this. Nowadays, many accommodations offer the possibility to refill. I find it more convenient than e.g. hand soap flakes.
- Mosquito spray (20ml) - They normally come in a spray bottle. Refill it into a smaller container without the spray head, you can easily apply the liquid by hand.
- Body oil (5ml) - that’s usually enough for me as this is very rich and I don’t need it every day
- Ear plugs & eye mask - these are especially important if you sleep in huts or shared accommodations
- Contact lenses & eye drops - As I wear glasses, I bring just 2 pairs of day lenses in case I break my glasses. This should usually get me to a place where I can organize a repair or replacement of my glasses.
Sun protection
Sun protection is incredibly important. On any hike, you’ll be out all day. And even if the weather is cloudy, you’ll be exposed to much more solar radiation than you’re likely used to. So always remember the following items:
- Sunscreen + sunscreen lip balm depending on the weather you’ll be experiencing
- Sunglasses - ideally ones that also cover the sides of your eyes
- Hat and/or cap - I can’t stress enough how important protecting your head is. Getting sunstroke is one of the worst things to experience on a hike, especially if you need to get up and hike on the next day.
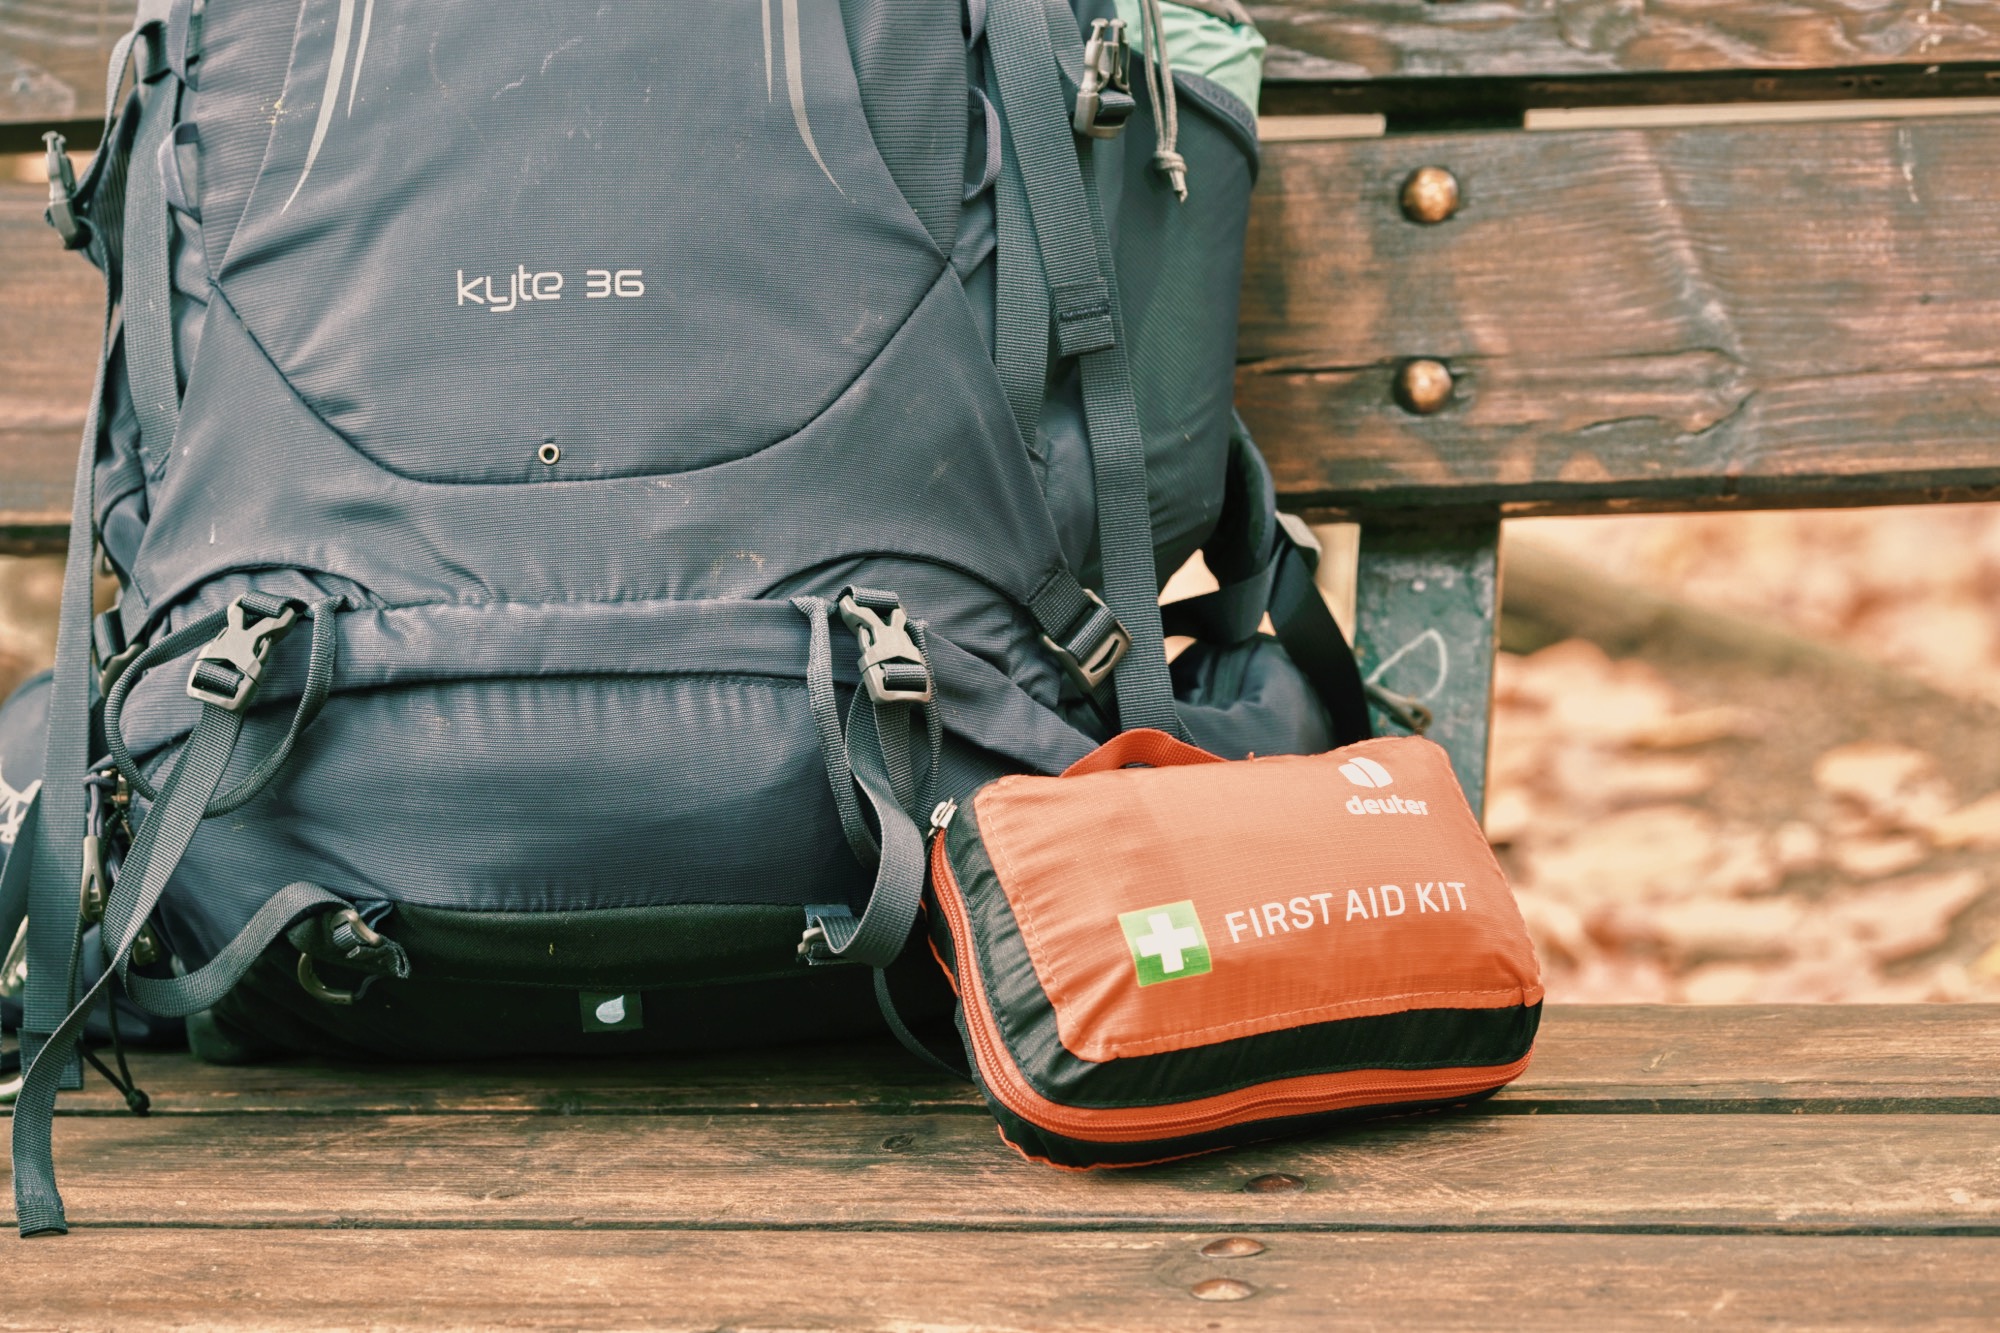
First Aid / Health
Packing sufficient first aid supplies and other medication is crucial, especially if you’re planning to do a more remote thru-hike.
This list is also very dependent on your personal health situation, but here’s what I normally take:
- Essential medication - please always make sure to take enough (and some extra) of any vital medication you’re taking
- Outdoor first aid kit - I always prefer a self-assembled kit over a ready-made one, because I can tailor it to my personal situation. But a ready-made one is better than none.
- Mint oil - this has been a life-changer for me. I read about mint oil in a hiker’s forum and since I’ve tried it, I never go anywhere without it. You can use it to massage your limbs and it has amazing cooling properties. It’s also an incredible pain and itch reliever for insect bites. And you can use it as a rub or inhalation essence if you get a cold.
- Hikers wool - another gem I learned about from a hiker friend. The best prevention for blisters I’ve ever had. You just need to put a little piece directly on your skin whenever you feel the first itch or sting of a potential blister. It’ll soothen the pain and ease the friction. Also, it’s fully natural and weighs nothing.
- Black roll (peanut) - this is more of a luxury item. But I always take it, because my back gets easily strained. I use it every morning to roll out my back, calves, and legs.
- Face masks
Food & Drink Equipment
This will again vary, depending on the type of hike you’re setting out on as well as your individual needs in terms of hydration.
For a thru-hike where every stage ends at a small village or some type of accommodation where you’ll be able to have dinner and/or breakfast, this could be a potential equipment set-up:
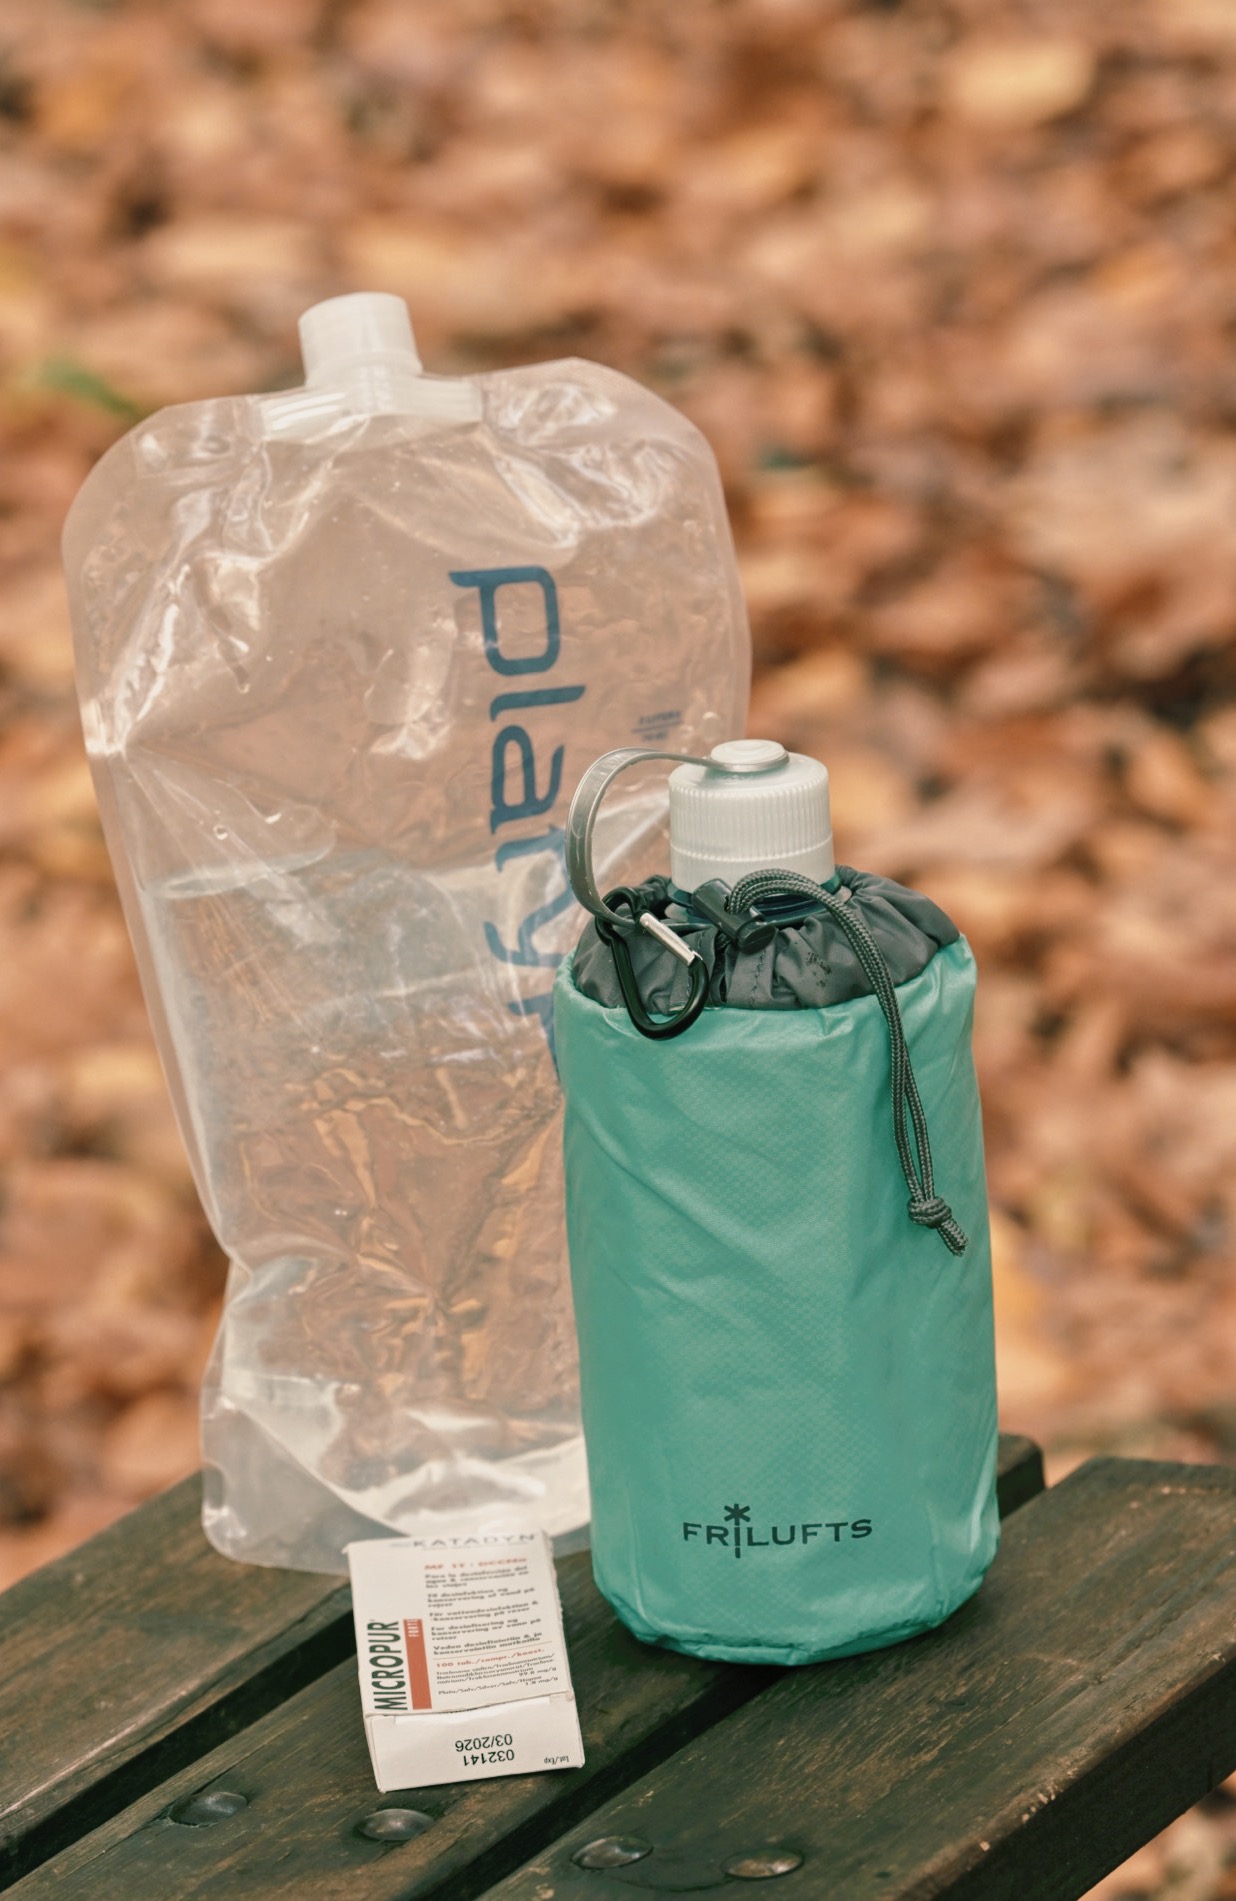
- Water bottle (1- 1.5L)
- Insulation sleeve for water bottle - This thing is brilliant! It keeps water warm for a solid 3-5 hours. The good thing is that (unlike a thermos flask) it does release heat relatively quickly, so you can drink the water quickly - without burning your mouth that is. This also means, your water bottle can function as a hot water bottle for cold nights or to relieve stomach pains, cramps, sore muscles, etc.
- Large, foldable water bottle (2L) - to give you highly flexible room for an emergency water supply
- Water purifying tablets - as an emergency backup
- 3-4 zipper bags - to pack lunch
- 2-3 small trash bags
- Tupper box
- Spoon
- A small pocket knife
- Some provisions like granola bars, nuts, etc.
Tech Stack & Important Documents
I always navigate with my phone. I use a hiking app called GAIA to download the gpx track of my route before setting out and it’s never failed me. But if you’re hiking far off the grid or in more dangerous terrain, I’d recommend taking one or two backup solutions, like a navigation device and a paper map & compass. Make sure, though, that you’re able to use both of them well beforehand.
I also take all my pictures with my phone. I just value hiking lightly and enjoying the experience along the way more than taking all my camera equipment for the perfect shot. So, my phone is quite important and it also saves me quite some weight.
Here’s an overview of what I normally pack:
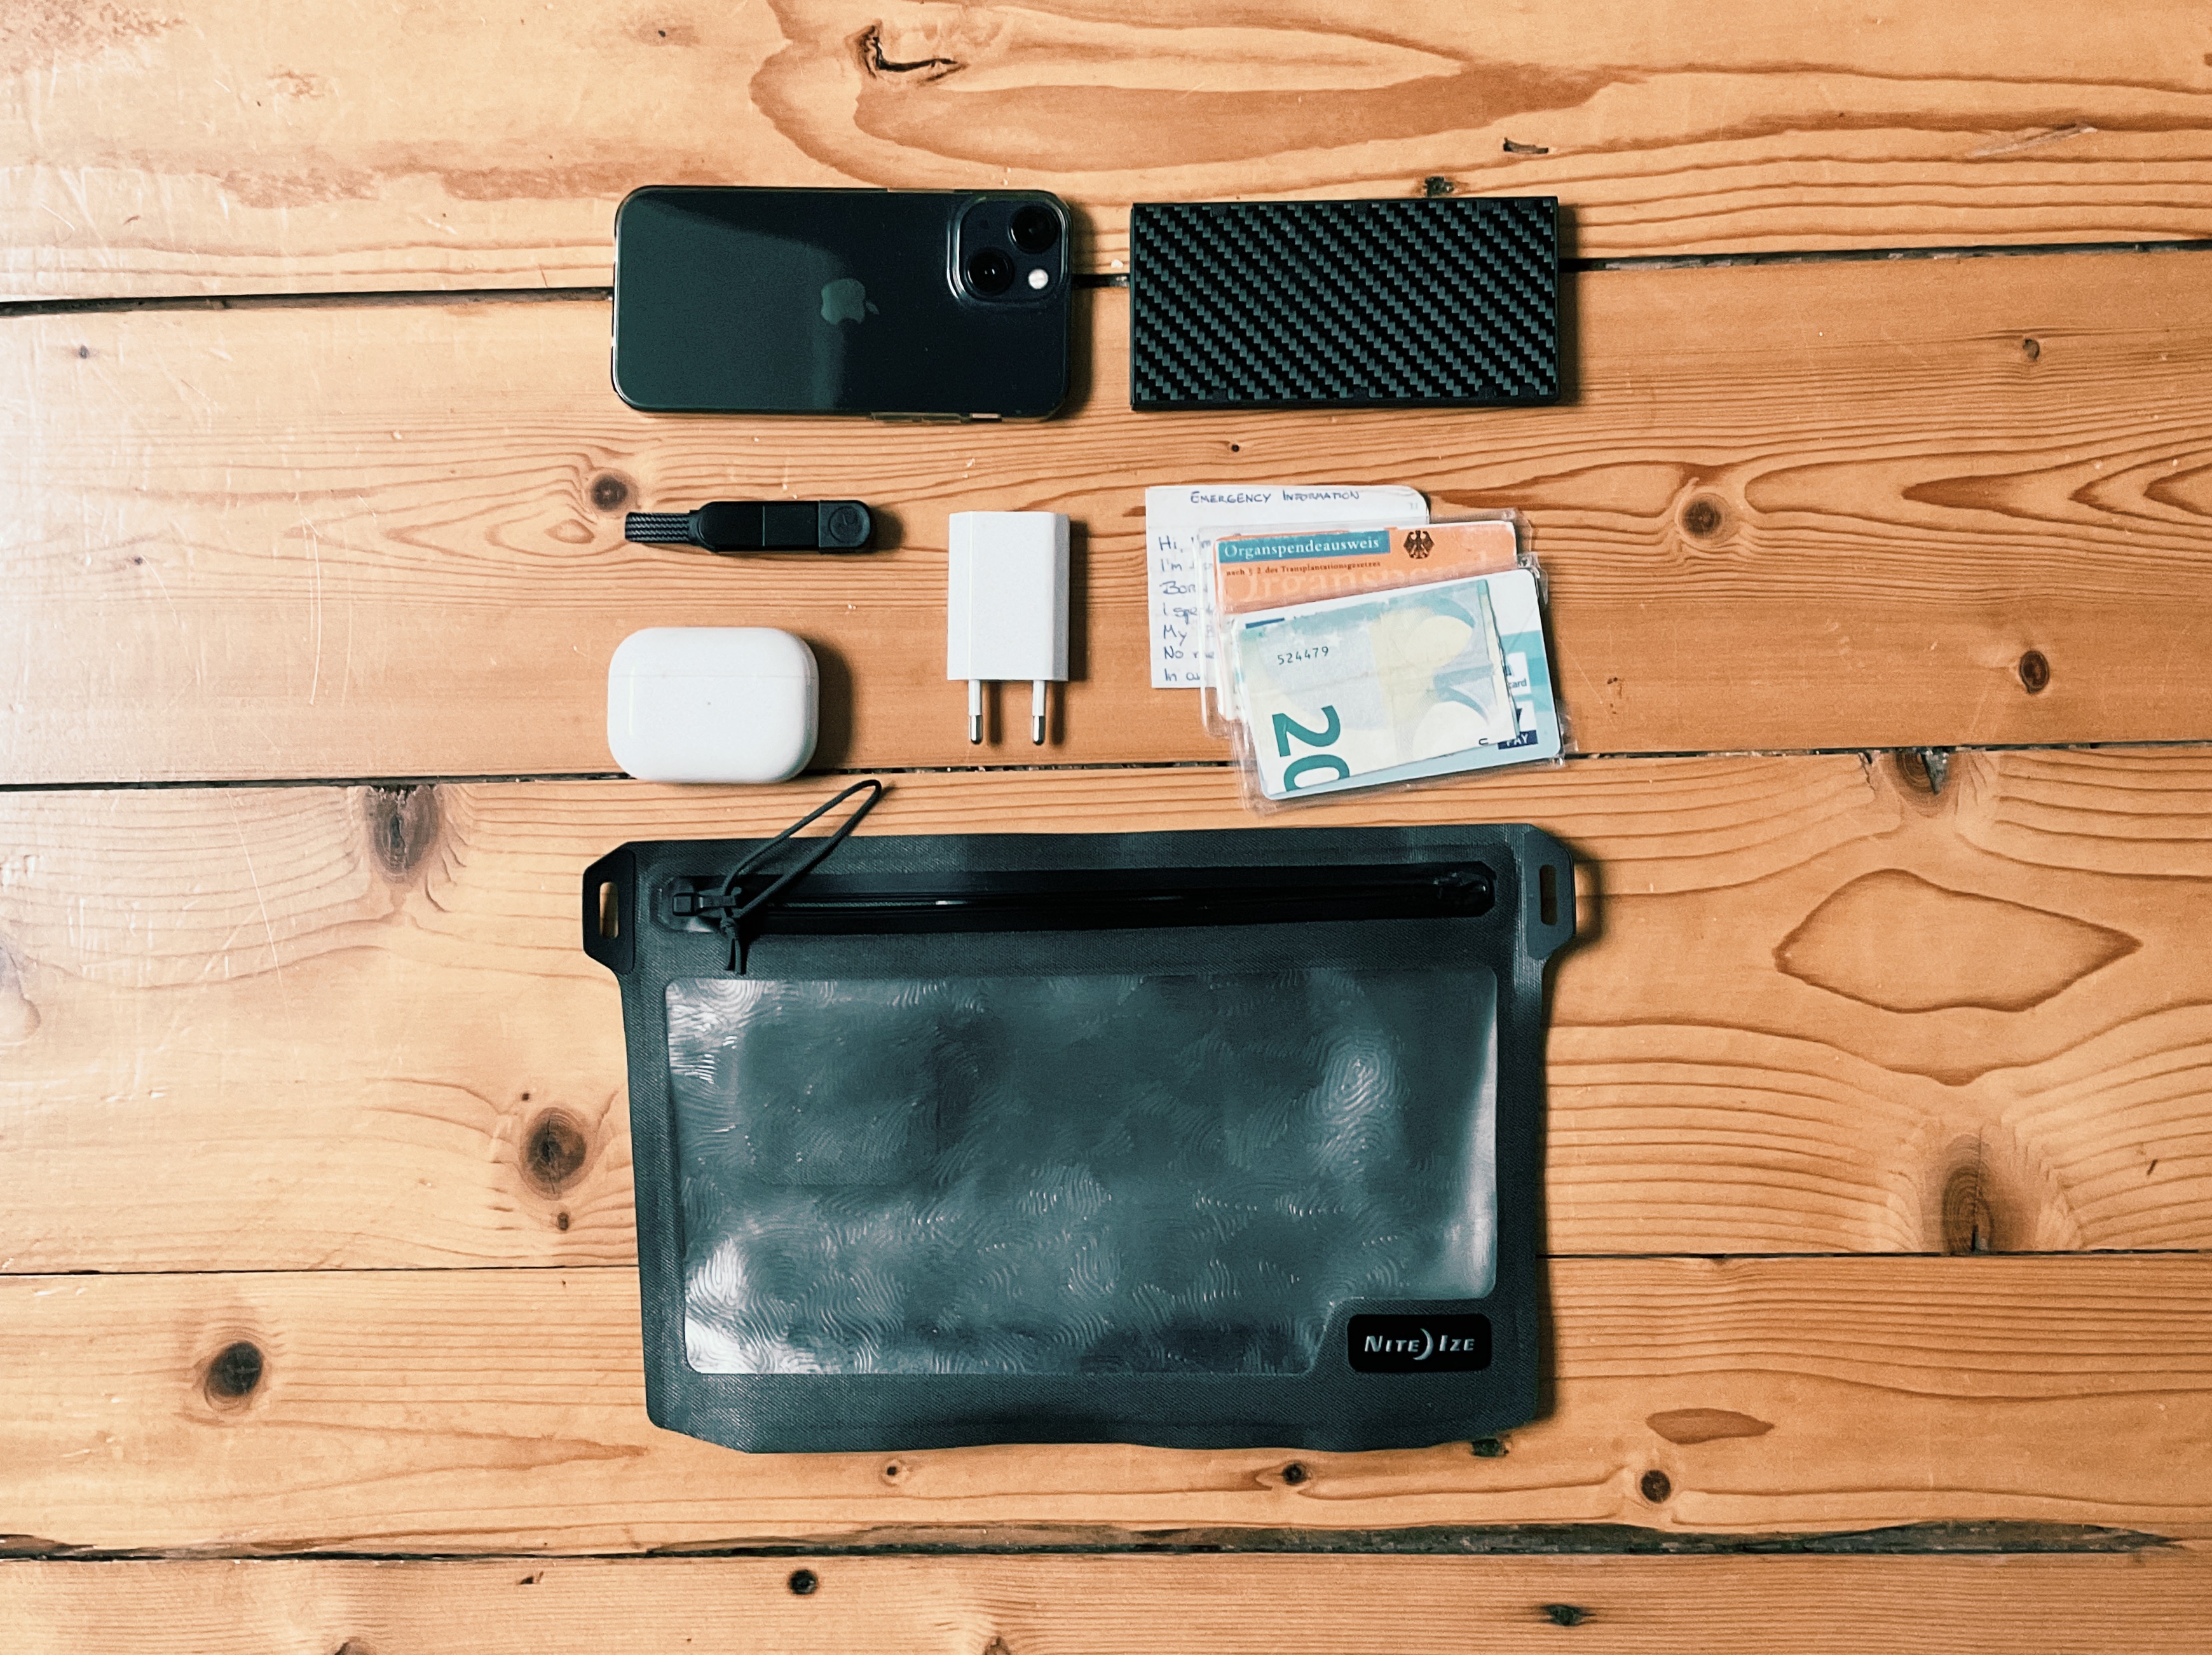
- Waterproof bag for all electronics
- Phone
- Powerbank - this is especially important if you use your phone to navigate and as an emergency device. I spent a lot of time looking for a high-quality, lightweight powerbank that would allow me to charge my phone 2-3 times and ended up with the Nitecore NB10000 with 10.000 mAh, which I’m very happy with. In addition, I always carry a small, emergency backup, the GoalZero Flip 12 with just 3,350mAh. This will charge my phone from 0 to about 80-90%.
- Charging cable (compatible with all your technical gear) - I hate having a different cable for every device. That’s why I love a good multi-cable adapter. I’ve tried several different ones and my favorite by far is the inChargeX from rollingsquare, which offers 6 different charging combinations and covers all my devices.
- Headphones - I like taking headphones because I love to listen to some music or an audiobook before going to sleep or giving my family a call.
- Cash - depending on the region you’re going to, I’d always recommend having at least some cash on you.
- ID card (or passport)
- Vaccination & other health certificates (digital)
- Debit & credit cards (on phone & one “regular” one)
- Health insurance card & organ donor card
- Emergency contact information - I have them on my phone as my medical ID card but also written on a small piece of paper that I carry in my wallet
- Pen & small notebook (optional)
Emergency (and just extremely useful) Stuff
Although hopefully, no real emergency will ever happen to you while hiking, it’s always good to be prepared. Especially on a thru-hike, it’s very important to be able to help yourself out of a tricky situation. And that can just be small things, like the sole of your shoe coming off or a broken strap on your backpack.
- Small pocket knife
I always take the smallest version of the Victorinox and have never felt like I needed a larger knife - Flashlight
Many people take a headlamp, but I prefer Rovyvon’s tiny keychain light, Aurora A8x. I just find it more versatile. It obviously has a bright flashlight. But with its transparent body, it can also function as a bedside table light. Additionally, it flashes red as an emergency light. It comes with a clip which I use to attach it to my cap, which makes it the perfect ultra-light multi-purpose light for me. - Pepper spray
Especially when hiking alone, I like to carry a small pepper spray for emergency self-defense situations. - Microcord
This is incredibly useful. Think a ripped shoelace, an emergency belt, a broken backpack strap, a “fishing pole” for your dropped keys, a washing line, … the use cases are endless. - Cable ties
I basically always have a few of these in my bag, but especially when hiking they’ve come in useful on various occasions. - Duct tape
Same here. I’ve read about a hiker, who walked an entire trail with taped hiking boots, as the sole came off on day one. No idea if that’s true, but I could definitely see how some duct tape would come in handy in this situation. - First-aid kit
I know I mentioned this already, but rather have it on here twice, as it’s really, really important to pack a well-stocked first-aid kit.
Safety Tips for Solo Female Hikers
Lastly, I often hear from my female friends that they don’t do longer thru-hikes because they are concerned that safety is an issue. Of course, I’d always recommend anyone (not just any women) to put safety first and take appropriate safety measures before setting out on a hike. But I also want to encourage you to get out there and make this incredible experience of being out in nature all by yourself. It’s an unbelievably rewarding and fulfilling experience. If you just need a little more confidence, here are a few safety tips that I found incredibly useful on my hikes:
- Be well-informed about the country you’re traveling to
This one holds true for any type of traveling. Make sure to be well informed about emergency numbers, customs in the country, laws & regulations of what you’re allowed to carry (e.g. in terms of knives or self-defense sprays), insurance, etc. - Know your route and make sure your friends/family/partner know it, too
It will give you a lot of confidence if you know your route well. It also ensures that in case something would happen and you don’t arrive at your planned destination in the evening, others can call help and tell them which part of your route they should look for you. - Share your location
As an additional safety feature, you could automatically share your location with someone you trust. There are many apps that allow you to do this, for example, if you own an iPhone, the “Find My” app offers the possibility to share your location. You could also take a gpx tracking device on you. - Align on when you’ll let your friends/family/partner know you’ve arrived safely
I think it’s important to give yourself the freedom to disconnect and enjoy the beautiful nature around you, find calmness and disconnect. But also make sure other people know you’re safe (especially if you have a worried family or partner at home). So align on a time you’ll text or call them, e.g. “I will check my phone at least every 5 hours”. Or “I’ll always call when I reach the day’s destination”. Or “I expect today’s stage to take roughly 6 hours. If you don’t hear from me after 9 hours and can’t reach me, please get help at this number.” - Take a bit more care when choosing your accommodation
This is something I always follow very carefully. When hiking a long-distance trail, e.g. hut-to-hut, or staying in different accommodations, I always make sure to properly check out the places I’m staying at beforehand. That includes reading booking & google maps reviews and a quick web search. I also leave a phone number of each accommodation with my family at home to make sure they have a place to call if they can’t reach me. - Have an extra backup power source to charge your phone
This is so simple, yet SO effective. There’s nothing worse than your phone, which is your navigation and emergency device running out of battery. I always carry two extra power banks with me, one very small one (3.500 mAh) and one slightly larger one (10.000 mAh). Both are still considerably lightweight, but offer me separate backup solutions in case I do run out of power. - Carry self-defense pepper spray
I always carry one when I go on hikes (not just solo ones). I’ve had quite a few situations where I had to pass a guard dog, which didn’t seem particularly happy about me being there. I’ve luckily never been attacked, but I did feel a lot safer carrying a self-defense spray. Obviously, this can also be useful for unwanted human encounters. - Be mindful of what you share with whom
When out on the trail, so far, I’ve only ever met really positive and friendly people. But looking back, on one or the other occasion I might have shared a bit too much about my route or the places I’m staying. I think it never hurts to stay a bit more vague about your route and form of travel when meeting strangers. Instead of saying “I’m hiking alone for the next 5 weeks”, you can always say something like “I’m meeting my friends at the end of the stage” or “I need to get going, my partner is waiting for my call”. Generally, it’s important to trust your intuition and listen to your gut feeling, which will normally get you very far. - Take a self-defense course
I think this is incredibly worthwhile, no matter if you’re setting out on a solo thru-hike or if you’re just living in a city. It’s important to know how to defend yourself in an emergency situation. Many local communities have free self-defense classes for women or offer them at a reduced price. - Take a first-aid course
This is just as important as a self-defense course. Even the best first aid kit won’t be of any help to you at all if you don’t know how to use it. I’d even recommend taking a first-aid course every year or two years as we easily forget what we don’t use every day.
Solo Long-Distance Hiking Should be on Every Woman’s Bucket List
Completing a long-distance hike all by yourself will likely be one of the most rewarding and empowering experiences you’ll make in your life. It certainly was for me. Thus, I’d recommend every woman (and generally every person) to at least consider giving it a spot high up on their bucket list. Being surrounded by nature, seeing your slow & steady progress along the route, and challenging your body and mind are incredibly rewarding aspects of such a journey. You’ll (re-)discover listening to your body, your needs, and your capabilities. Having so much time all to yourself allows you to disconnect from the world, and connect to yourself. Ultimately, this is what will enable you to make space for what really matters to you.
If you want to read on, here’s an overview of my latest long-distance hike on the Alpe Adria Trail.
And in case setting out on a longer thru-hike isn’t possible for you right now, find out how you can connect with nature even while living in a city.